Zoom integration
The live session helps the facilitators and learners to communicate with each other along with the knowledge transfer. The given steps below provide the guidelines for creating a Zoom session.
- Login into the dashboard using the credentials
- From the dashboard, go to Settings
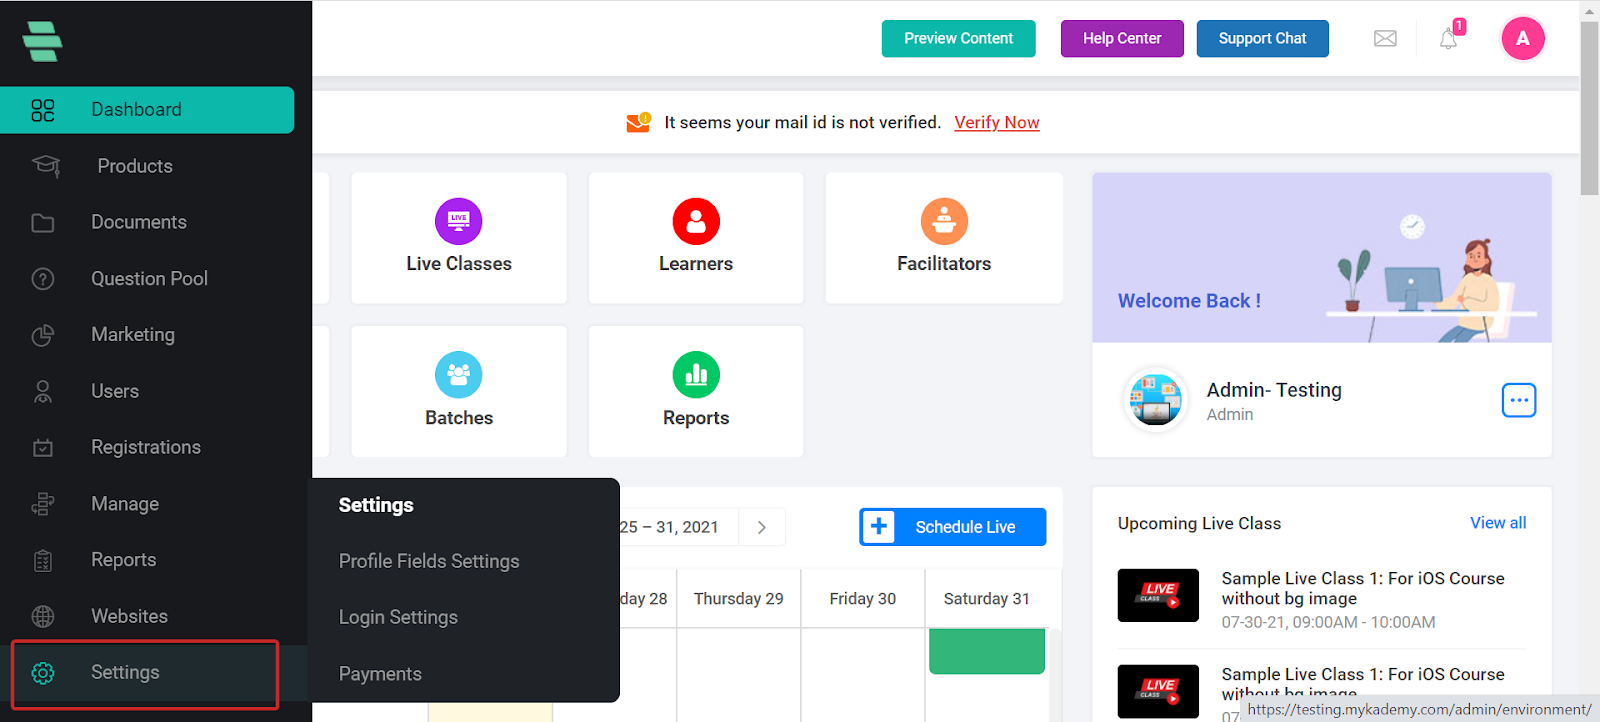
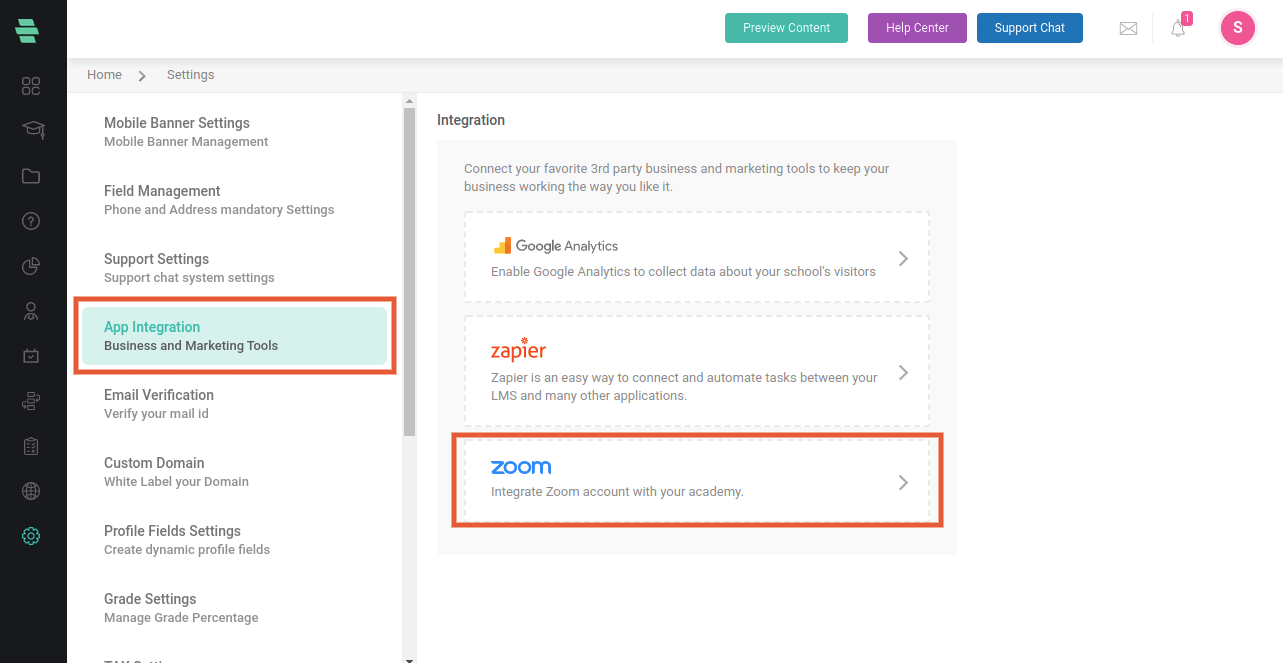
- Select App Integration
- Choose Zoom
- Click on Add to Zoom
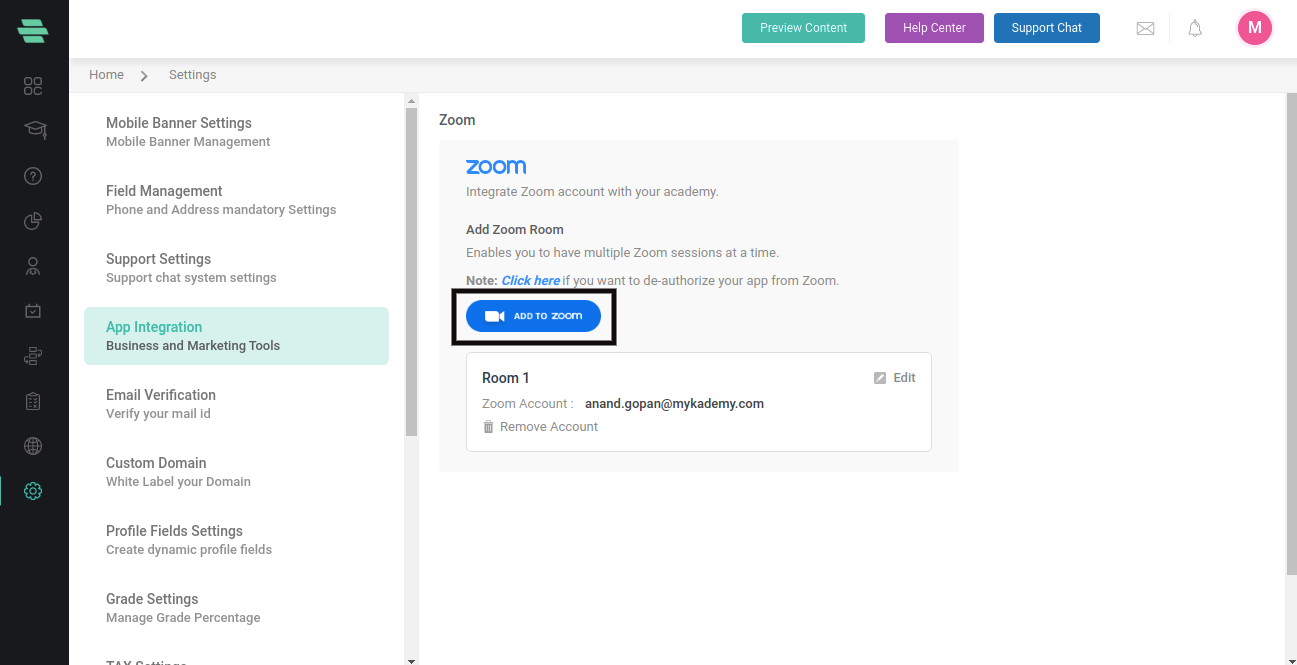
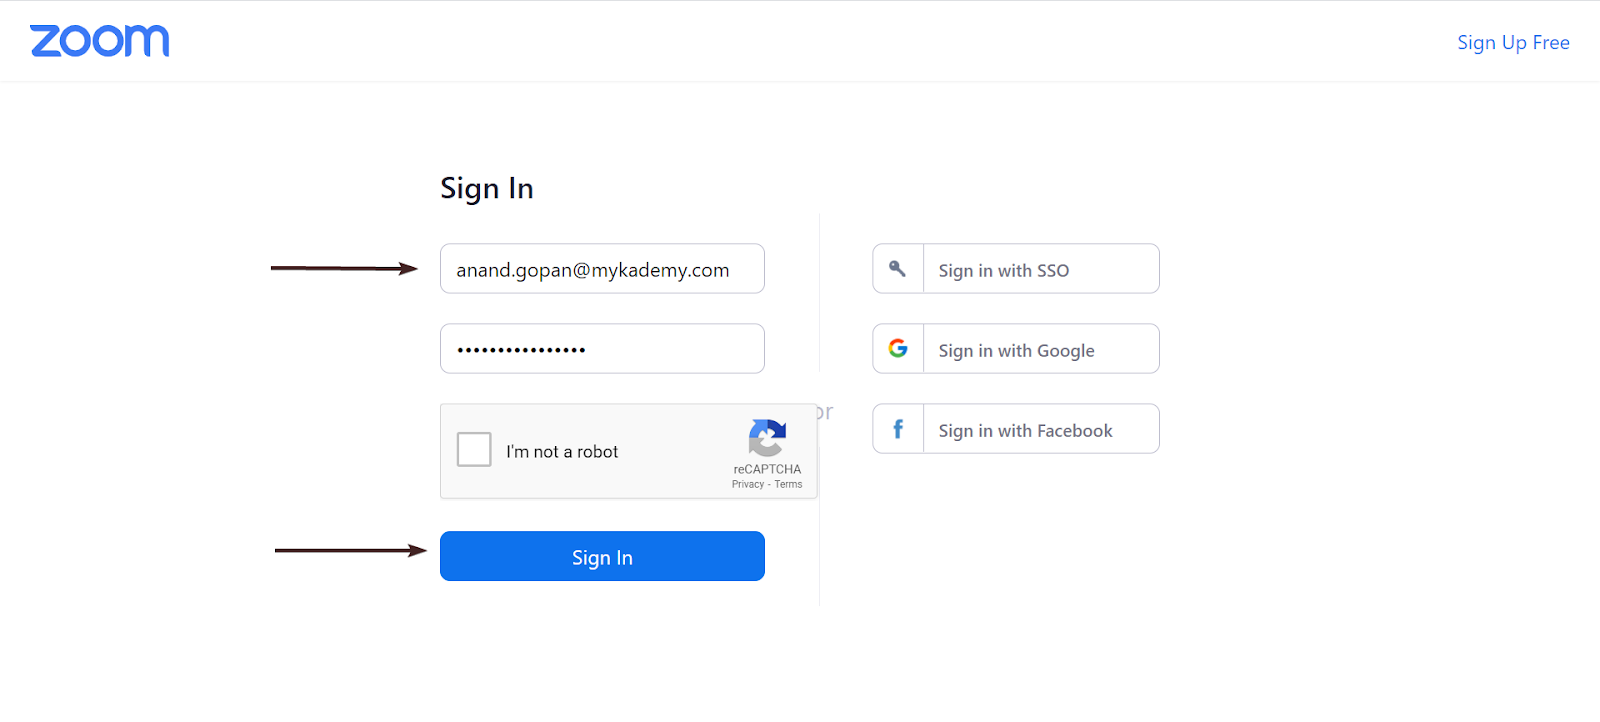
- You will be taken to a page where you have to type the email id and password of your Zoom account.
- Enter the credentials and select ‘ I am not a robot’.
- Click on Sign In
- A Zoom account is connected with the Mykademy platform.
- You can also sign in using the SSO/Google/Facebook.
- You will be taken to a page as shown below.
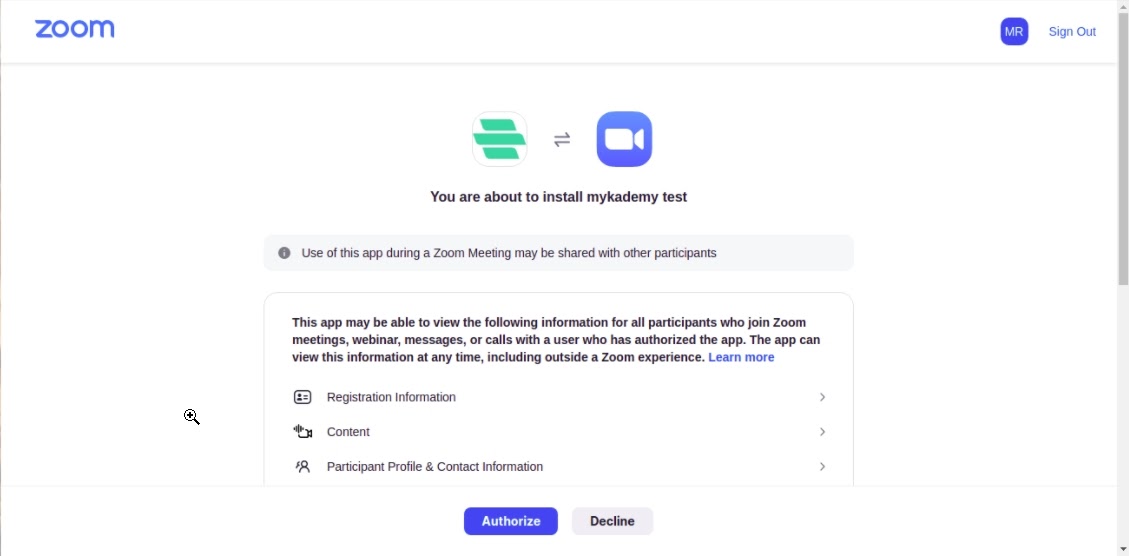
12.Click on Authorize so that the Mykademy platform and the Zoom account will be connected.
How to schedule a Zoom Live Session outside the course
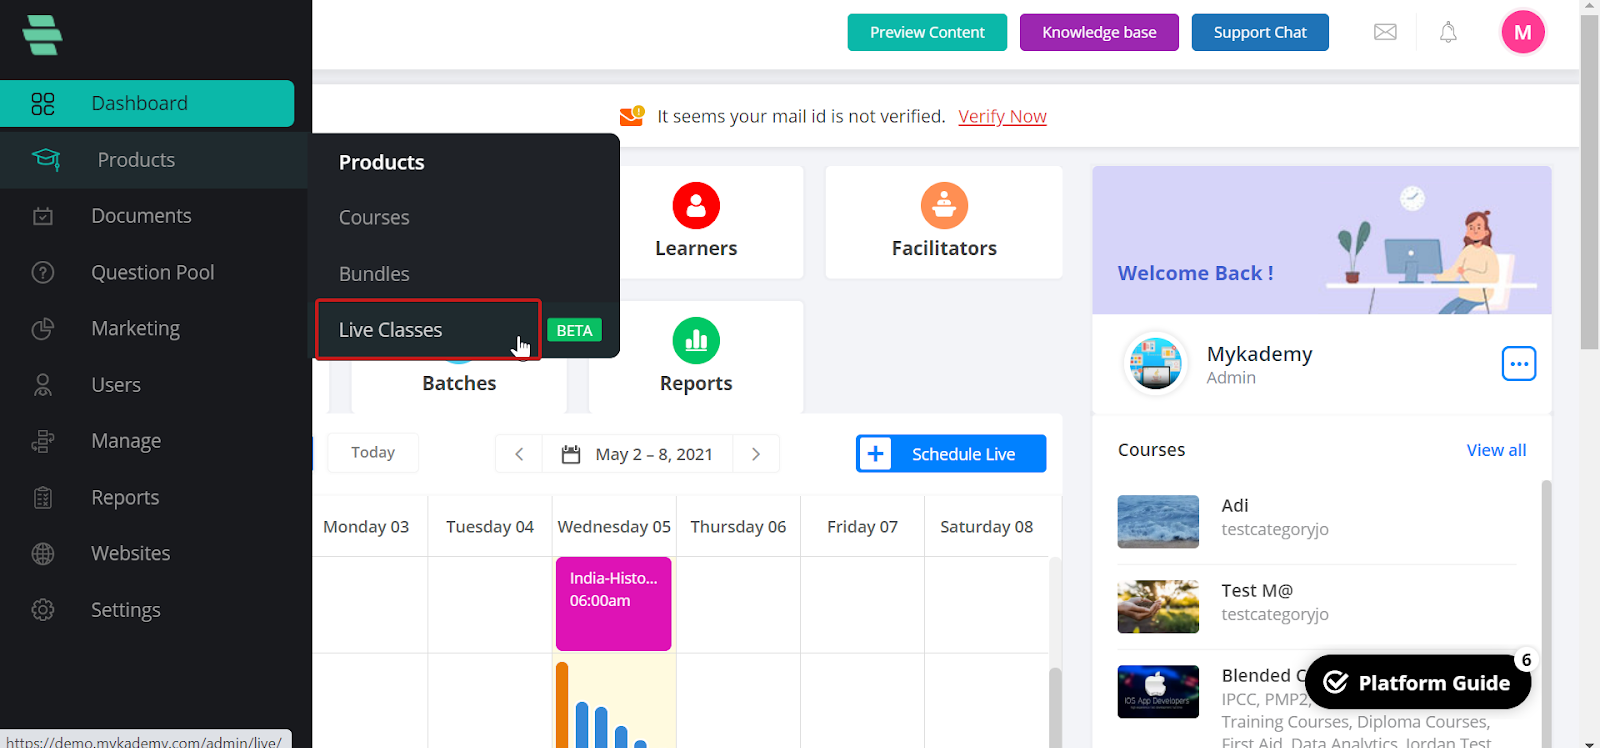
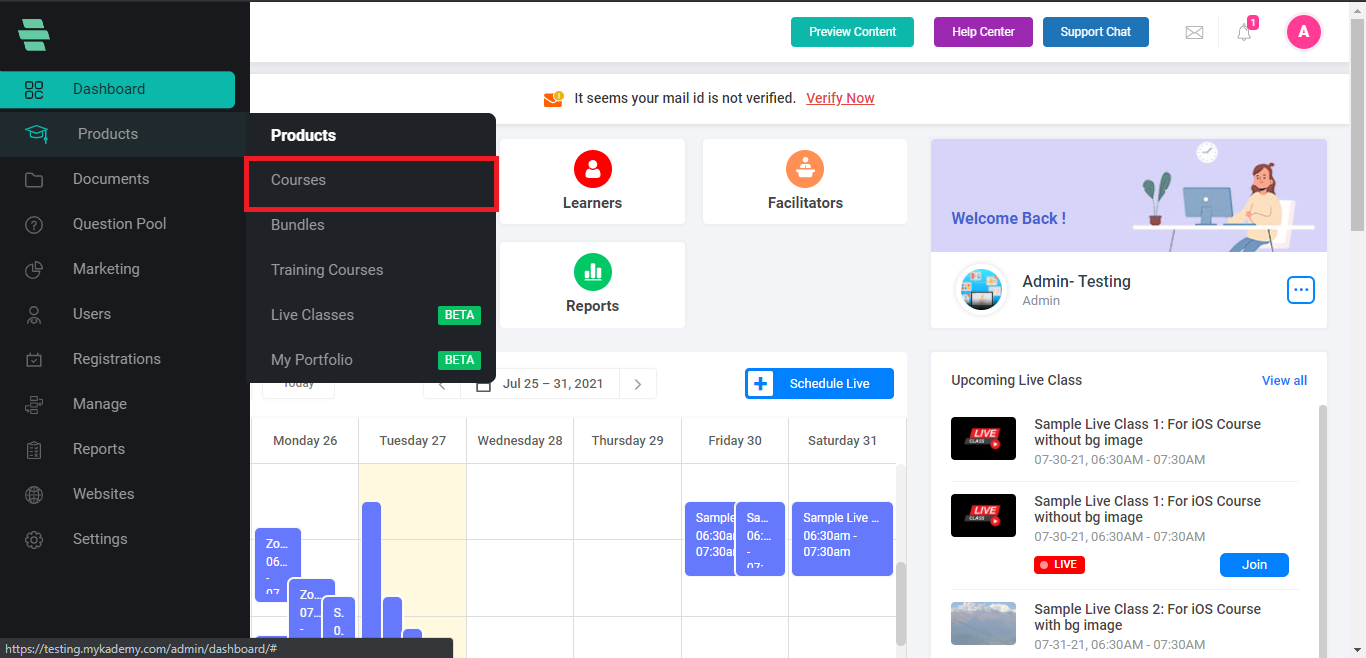
- From the dashboard, go to Products
- Select Live Classes
- You will be taken to the page to Create a live class
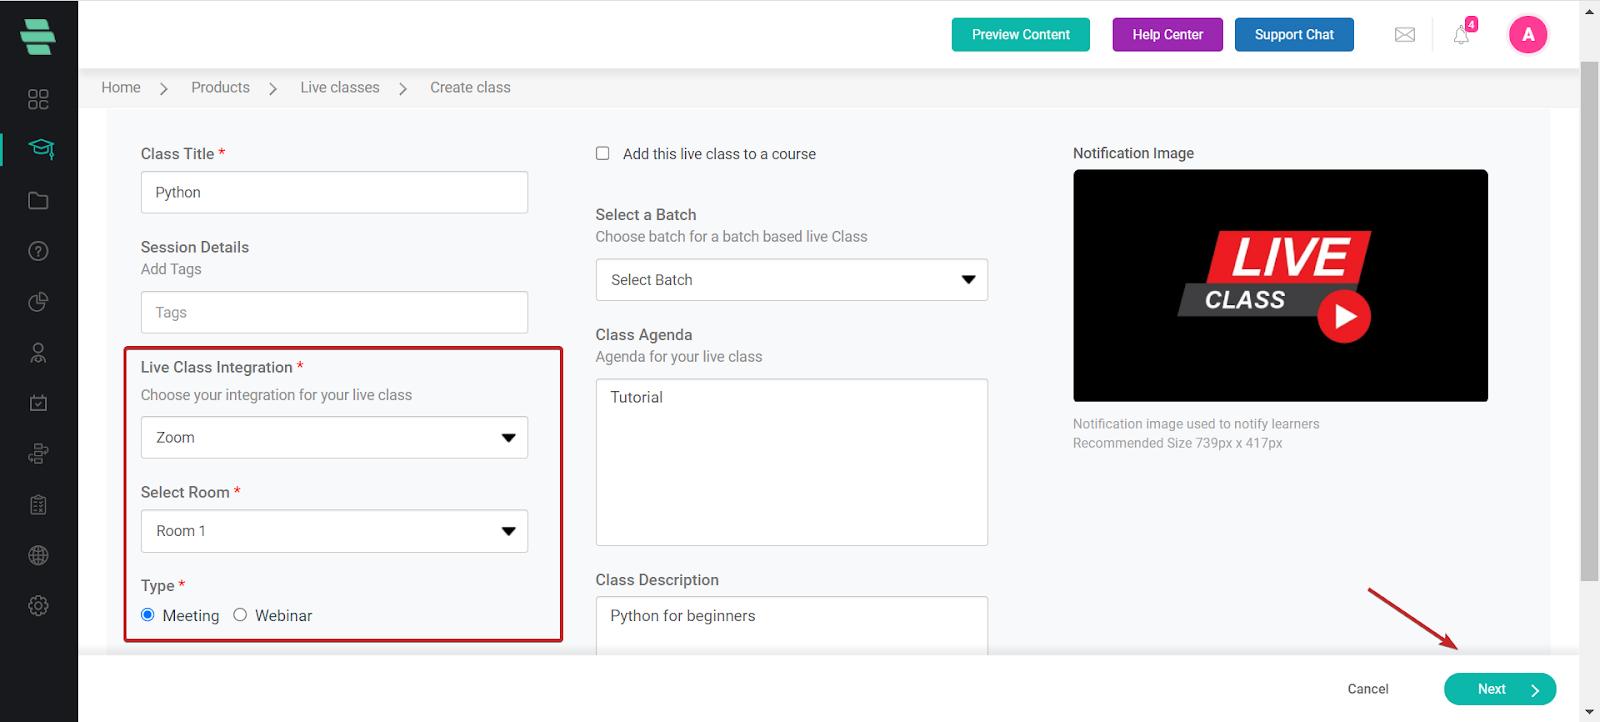
- Enter the title name for the live session
- Select Zoom as the Live Class Integration option from the dropdown.
- Select the room.
- Choose whether the session is a Meeting or Webinar
- A meeting is an interactive live session whereas a Webinar is a one-way communication session.
- Select the start date, start time, and duration.
- Select the Time Zone.
- Add live class into a course should not be checked since we are planning to schedule the session outside the course.
- Batches can be mapped to this live session if needed. Batches include a set of students which are grouped by the admin/tutor.
- Enter the Class Agenda and Description(optional).
- Click on the Next button located at the right bottom corner.
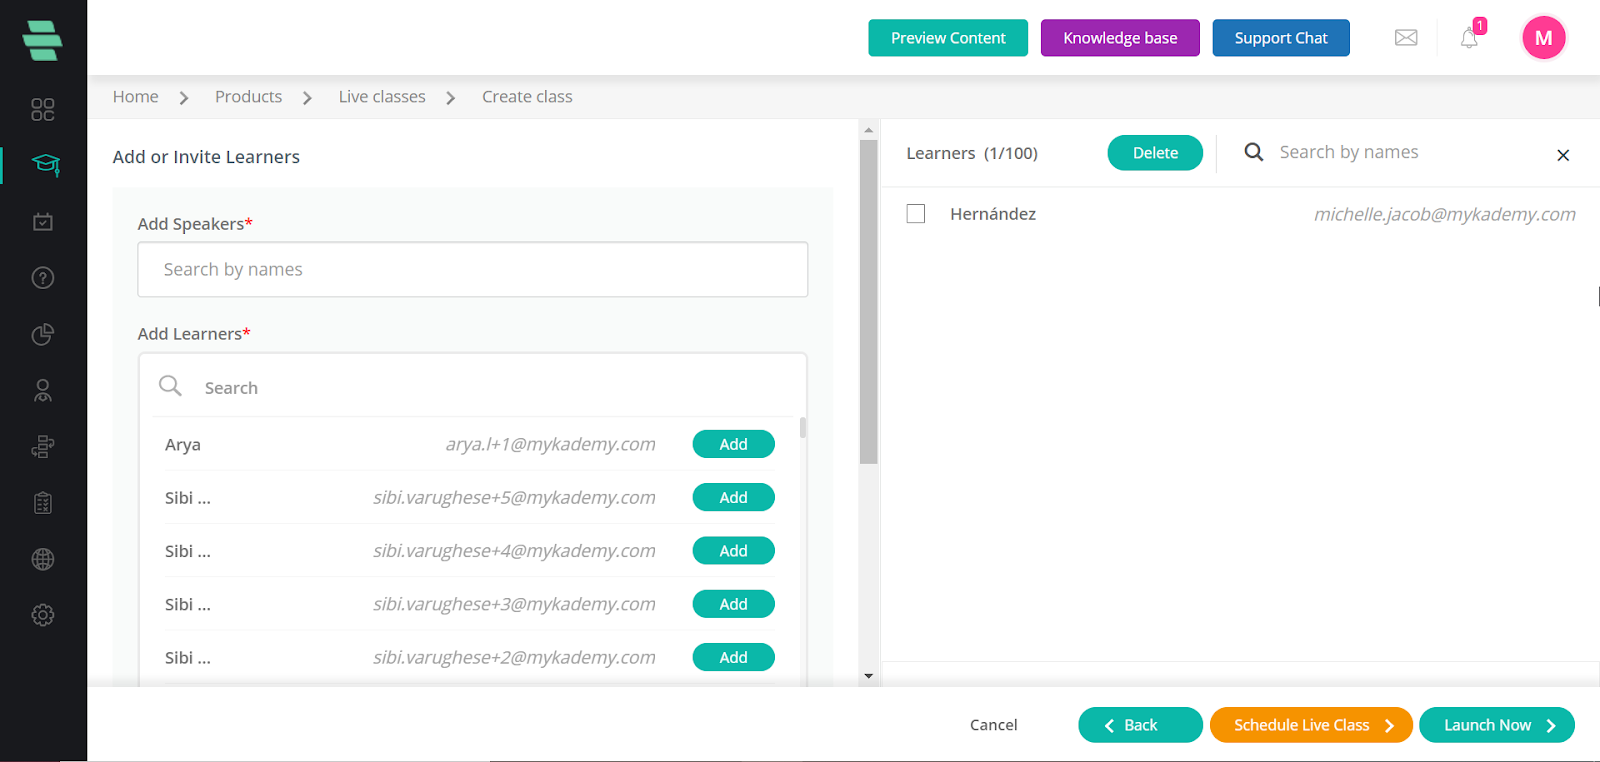
- On this page, you can search for the speakers and learners and add them as attendees to the live session.
- There is also an option to add learners as bulk by giving their name and email address(Name, Email address and click on Enter).

- After adding learners, click on Schedule Live Class to schedule the live
- Once you Schedule the Live, a sharable link will appear in a pop-up window that can be shared by the admin to other facilitators who are not added into the live session.

- The tutors can copy the link and share it via any other medium.
- Close the pop-up so that you will be taken to the section detailing page.
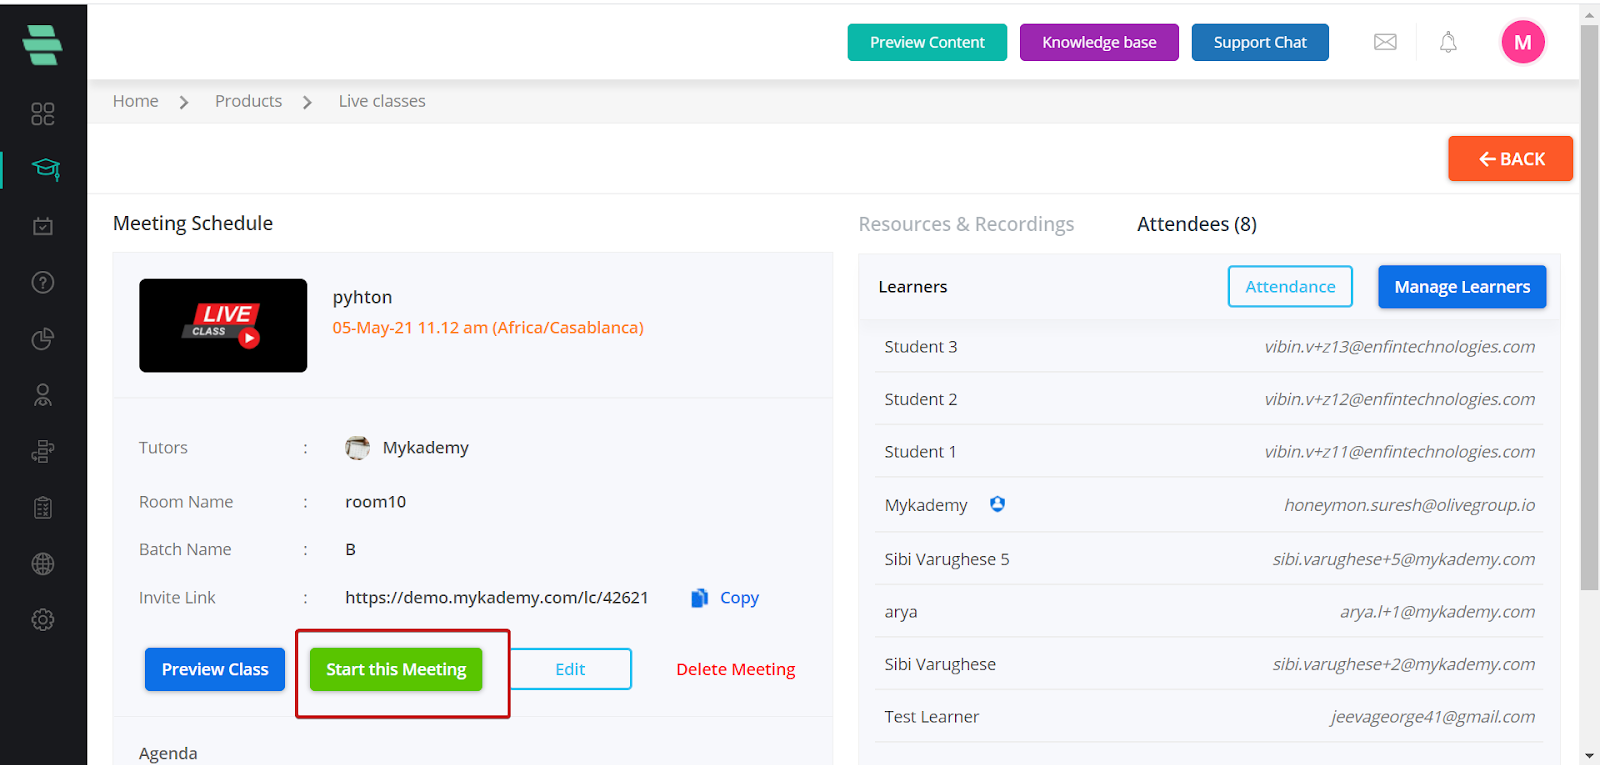
- Admin or Tutor can join the session by clicking on Start this Meeting.
- By clicking on the Back button, the tutor will be taken to the scheduled live session list as shown below.
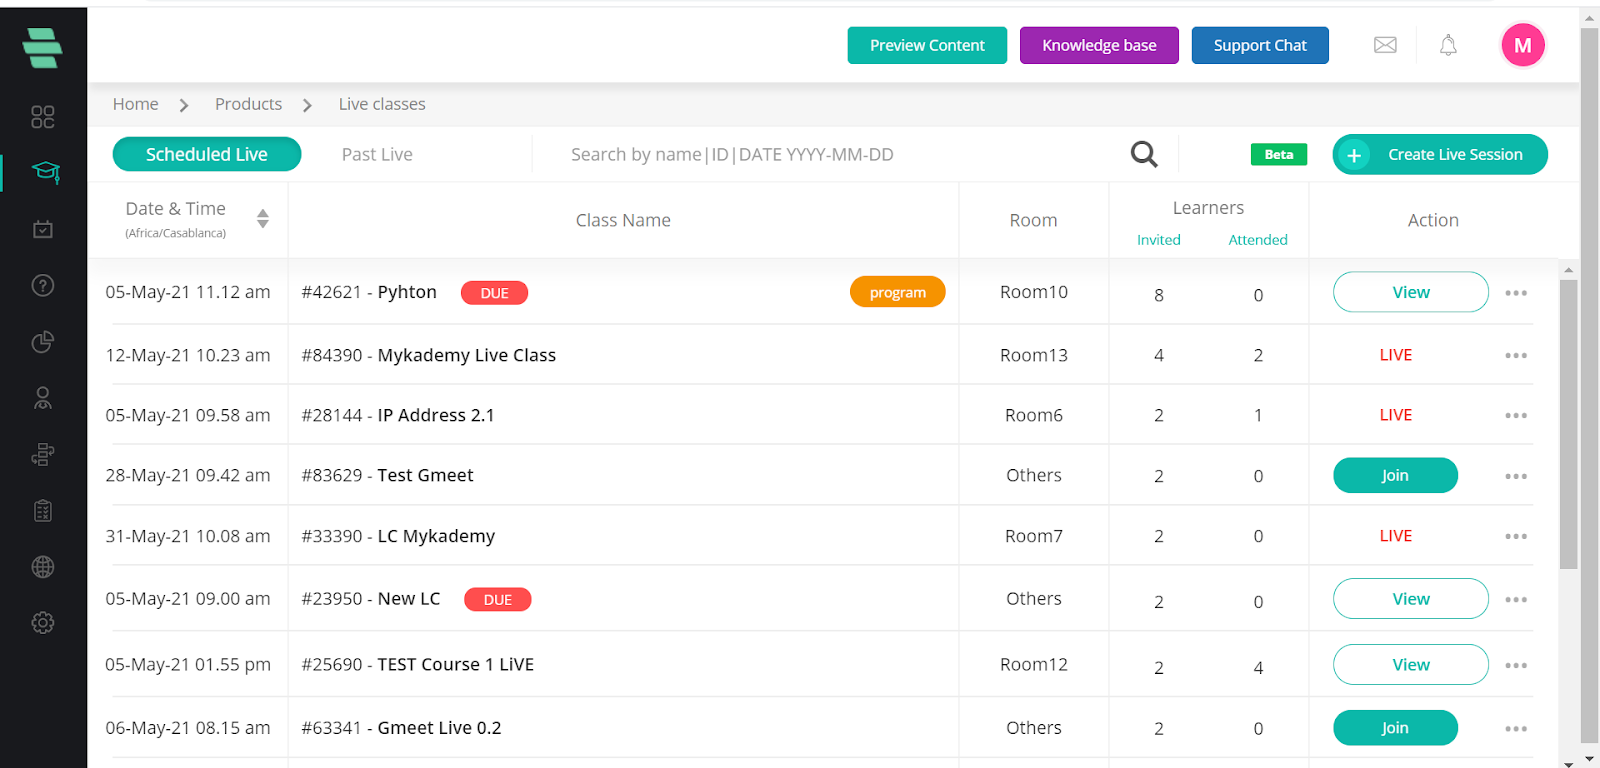
- Once a session is scheduled, various operations can be performed using the three dots button located on the right side for each session.

- Edit: The live session details can be edited
- Copy sharable link: The session link will be copied and can be shared via any other medium
- Attendees: The speakers and learners who are being invited to the session will be reflected.
- Duplicate: The scheduled session will be duplicated.
- Cancel: The scheduled session will be cancelled.
- Once the session is over, it automatically moves to the past live session.
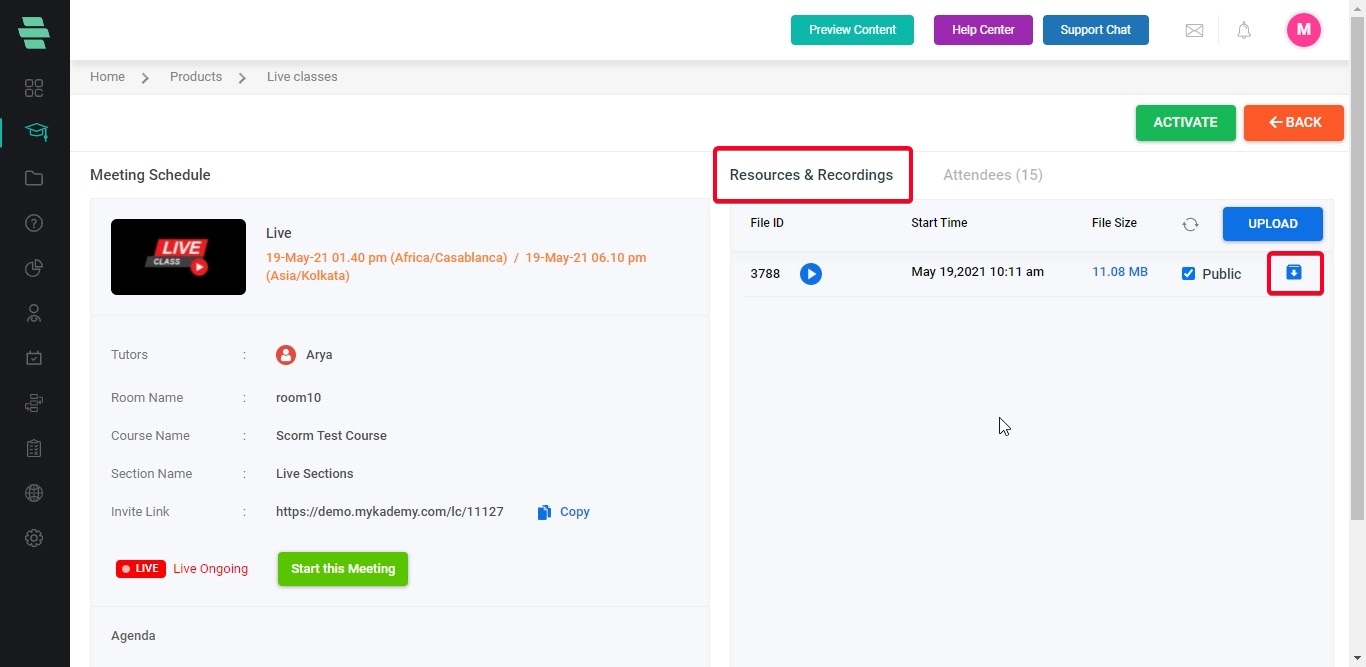
- From the past live, the admin/tutor can download the recordings which will be available under the Resources & Recordings button.
How to schedule a Zoom Live Session inside the course
- Login using the admin/Tutor credentials.
- Click on the Courses icon or from the dashboard, go to Products
- Select Courses
- You will be taken to the course dashboard where you can see the list of active courses.
- From the active courses page, click on any of the course in which the live session is to be created.
- You will be taken to the Course overview page. From this page, click on the Course content menu.
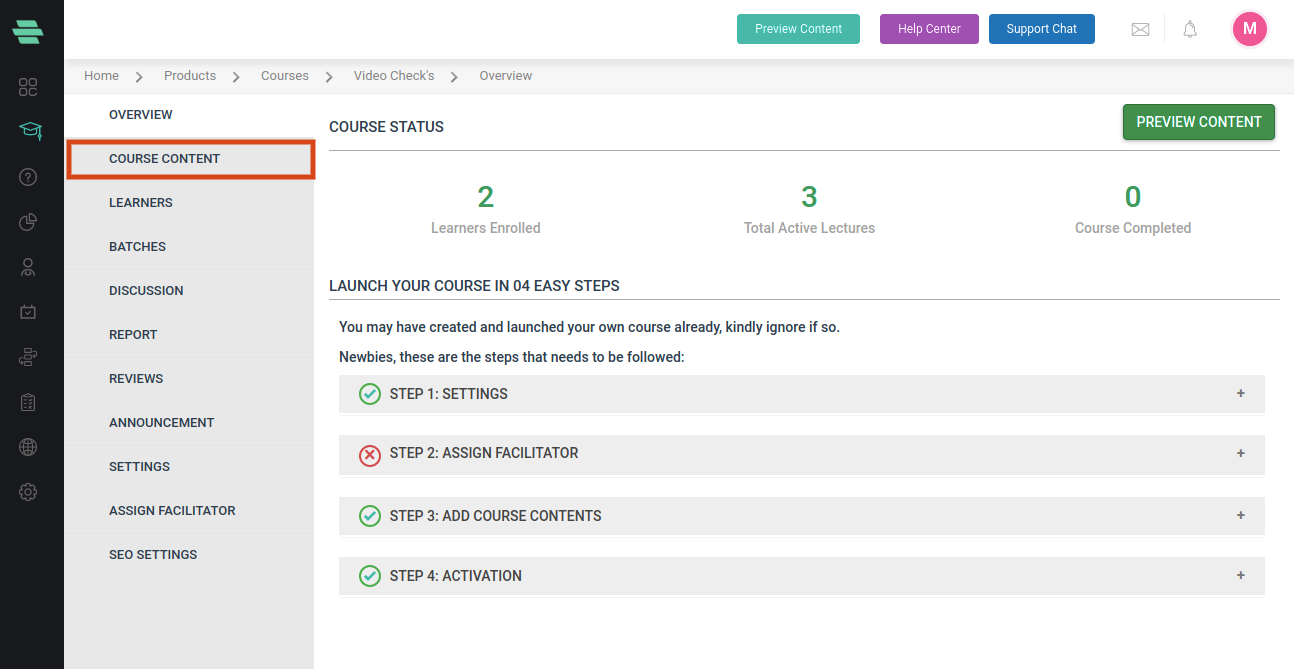
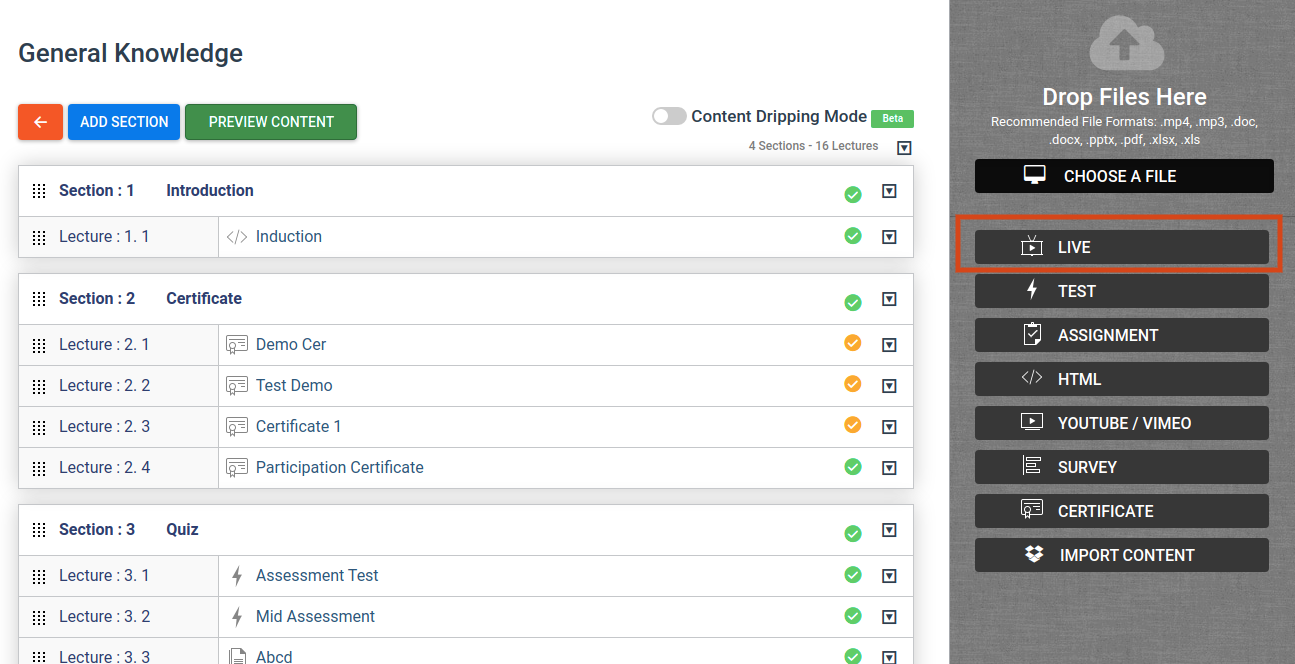
7. You will be taken to the content builder page.
8. Click on LIVE located at the right end.
9. A pop-up will be opened wherein you can enter the Title, section, Batch, and Date & time along with duration.
10. Notifications can be sent to the learner about this live session if needed.
11. Click on the Schedule button.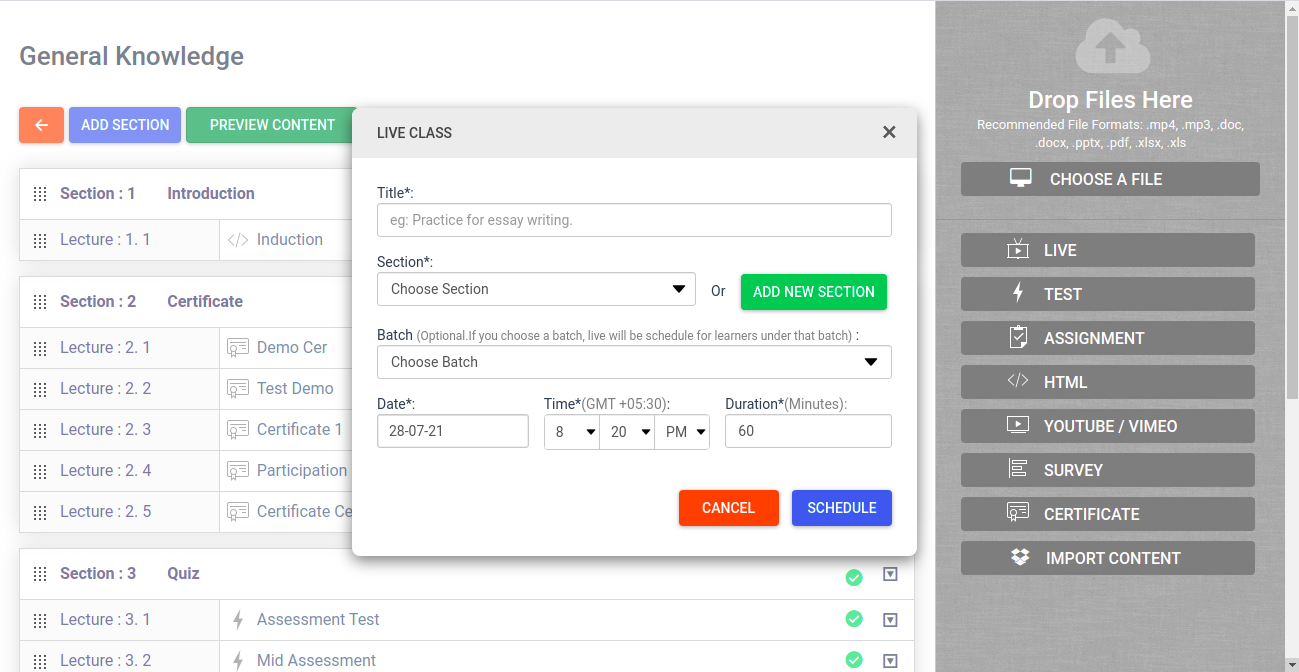
12. By clicking on schedule, the tutor will be redirected to the page where live session details can be entered.
13. Select Zoom as Live Class Integration from the dropdown
14. Select the room.
15. Select the start date, start time, and duration.
16. Select the Time Zone.
17. Enter the Class Agenda and Description.
18. The agenda and description of the live session will be displayed at the bottom.
19. Click on the Next Button.
20. On this page, you can search for the speakers and learners and add them as attendees to the live session.
21. There is also an option to add learners as bulk by giving their name and email address. (Name, Email Address and click on Enter)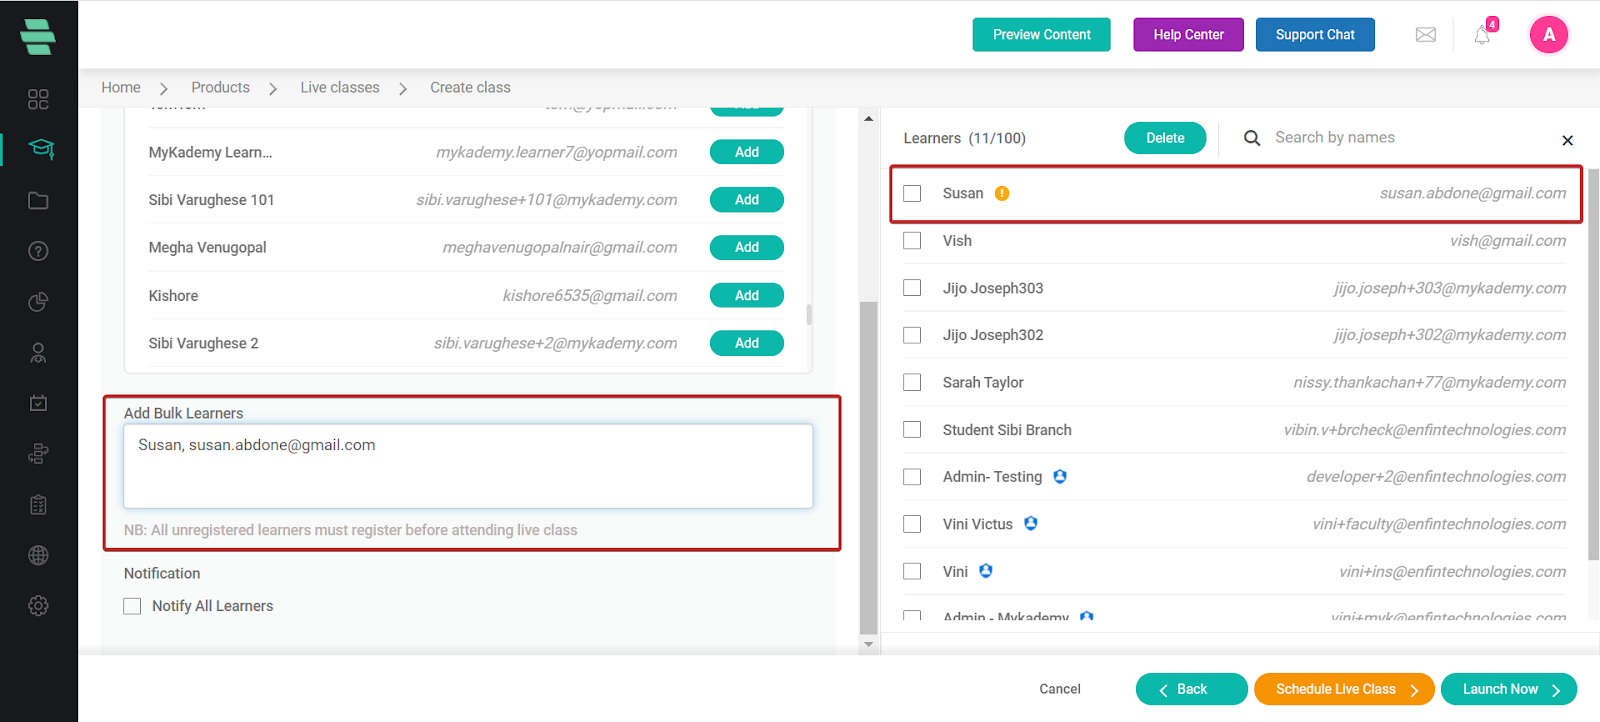
22. On the right side, all those learners who are enrolled in the live session will be displayed.
23. When a live session is created within a course, all those learners who are enrolled in the course will be included in the live session.
24. If any learner is to be removed from the session, then the admin can click on the checkbox corresponding to the learner and click on the Delete button.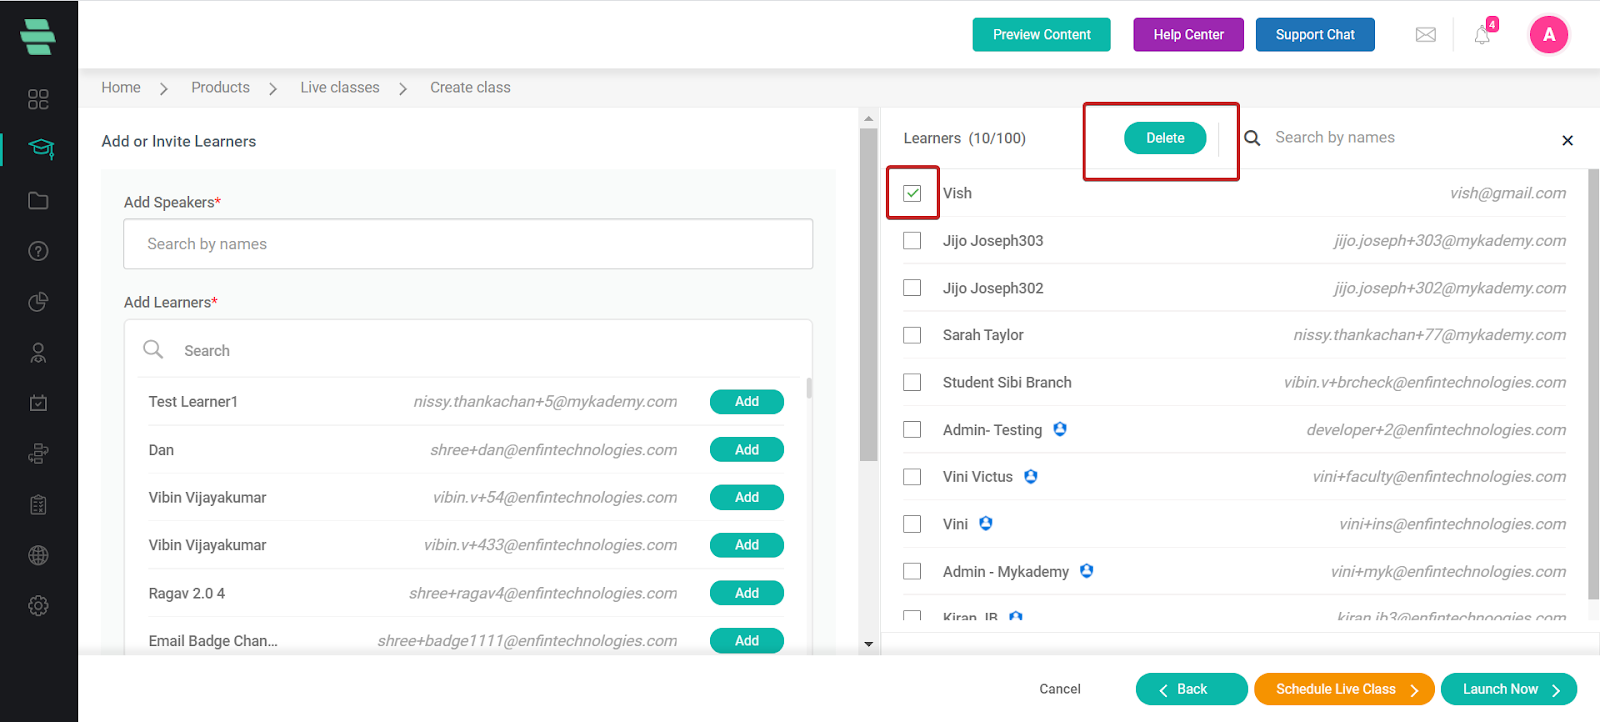
25. Once the learners and speakers are added, click on Schedule Live Class.
26. The tutors can copy the link and share it via any other medium
27. Close the pop-up so that you will be taken to the section detailing page.
28. Tutors can start the session by clicking on the Start this Meeting button.
29. By clicking on the Back button, the tutor will be taken to the scheduled live session page.
30. Once a session is scheduled, various operations can be performed using the three dots button located on the right side.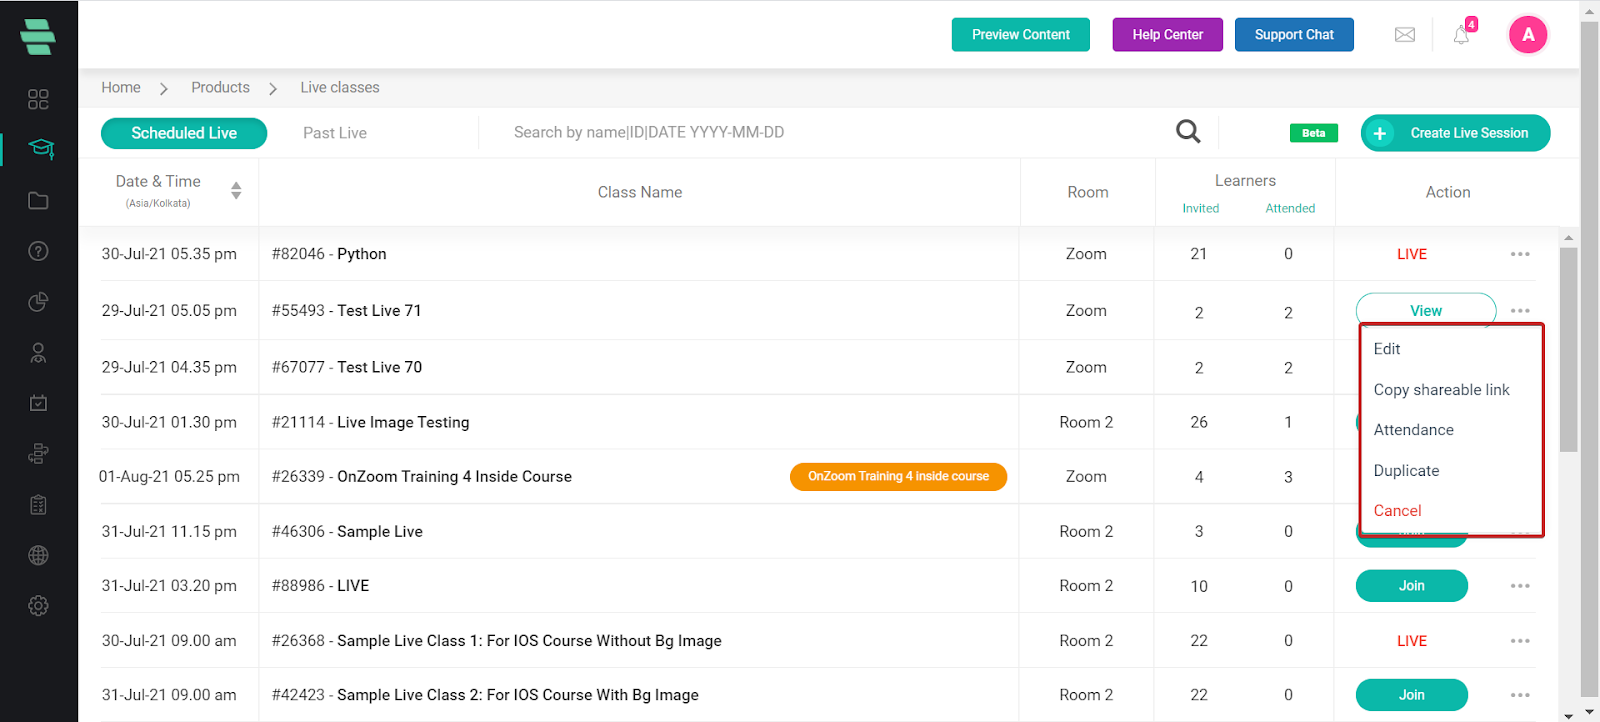
31. Edit: The live session details can be edited
32. Copy sharable link: The session link will be copied and can be shared via any other medium
33. Attendees: The speakers and learners who are being invited to the session will be reflected.
34. Duplicate: The scheduled session will be duplicated.
35. Cancel: The scheduled session will be cancelled.
36. Once the session is over, it automatically moves to the past live session.
37. From the past live, the admin/tutor can download the recordings which will be available under the Resources & Recordings button. 
38. By selecting the Public checkbox, the live session recordings will be displayed as a lecture of a selected course.
How a learner can join the Zoom Live Session
- When a learner is added to the live session, the learner will get notified in the email as shown below.
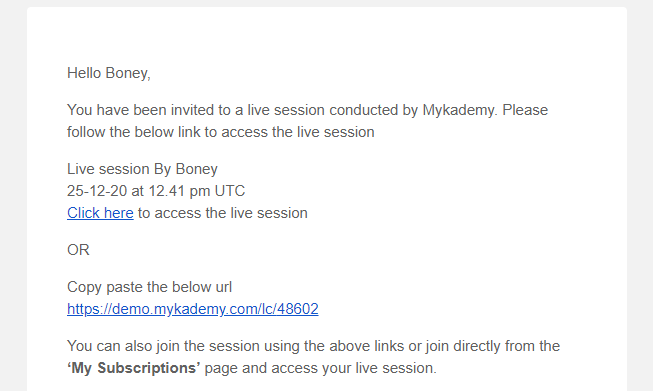
- The learner can enter into the live session by clicking on the link provided in the email.
- By clicking on the link, the learner will be taken to the lobby page.
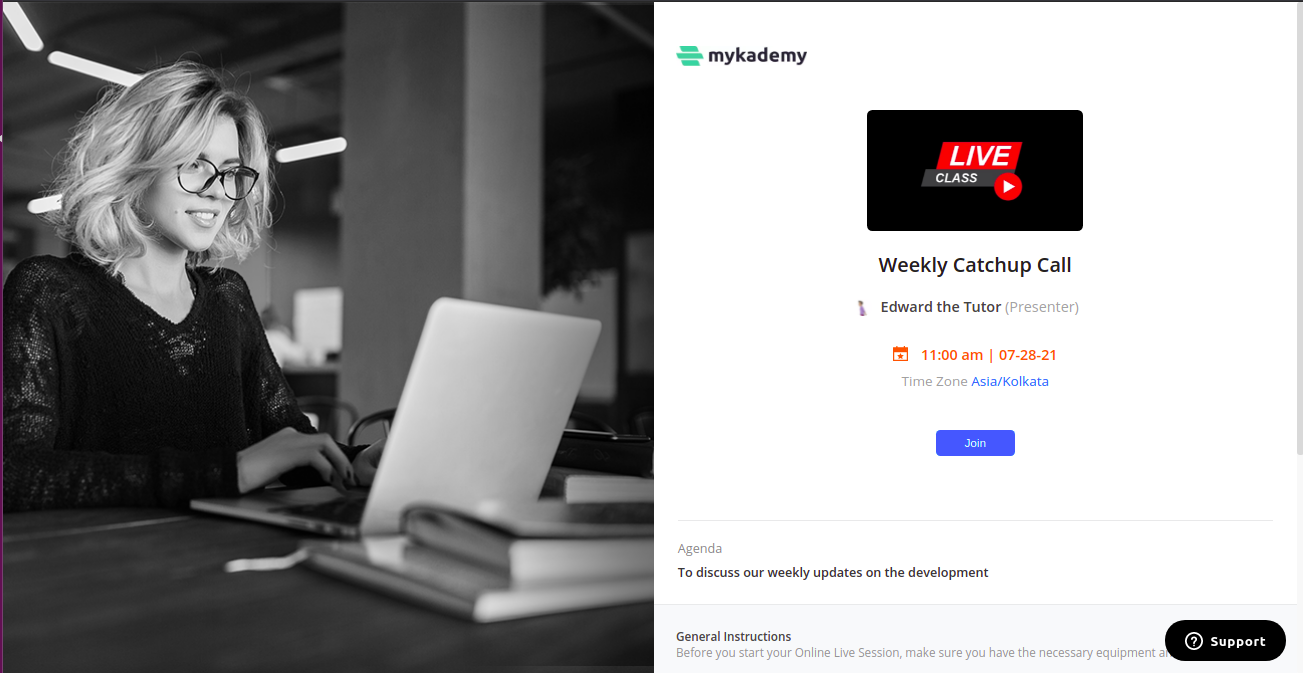
- In the lobby pager, click on the Join button so that the learner can join the Zoom live session.
How to uninstall the Mykademy app from the Zoom account
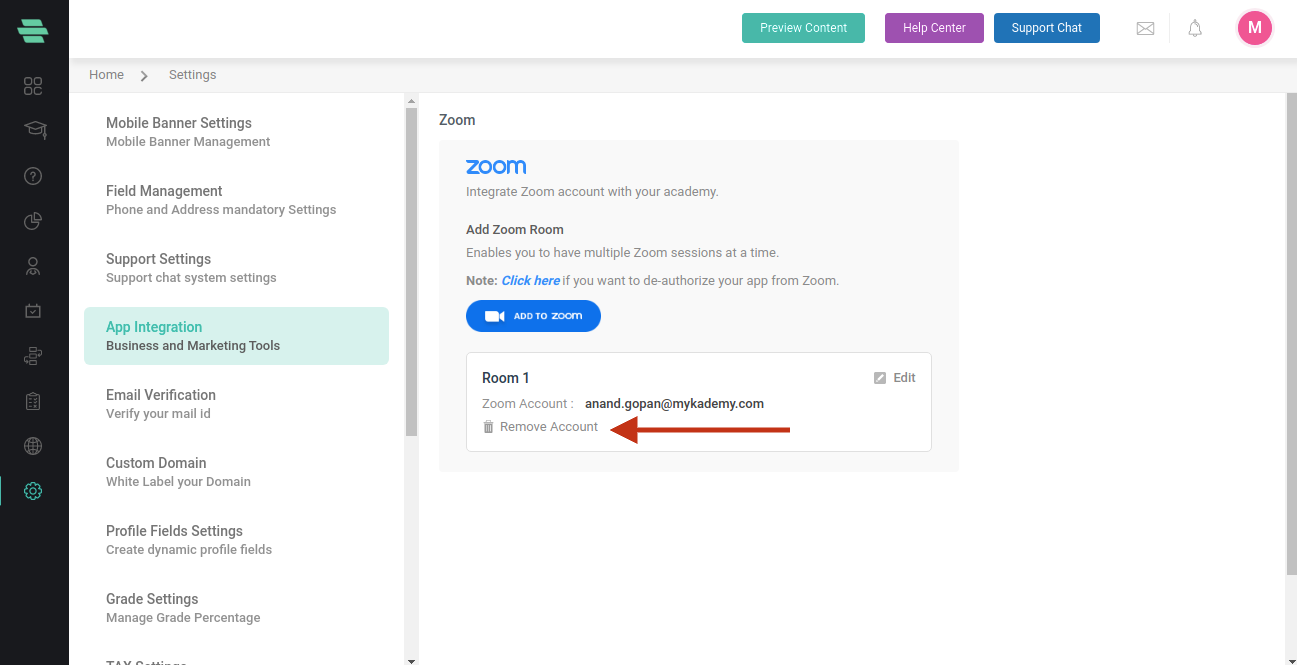
- From the dashboard, go to Settings
- Select App integration.
3. Click on Zoom.
4. The Zoom account which is already linked with the platform will be displayed.
5. Click on the Remove account button that corresponds to the specific account which you want to remove.
6. If you want to deauthorize any app from the Zoom, click on the Click here button which is available on the top of Add to Zoom button
7. A confirmation pop-up appears.
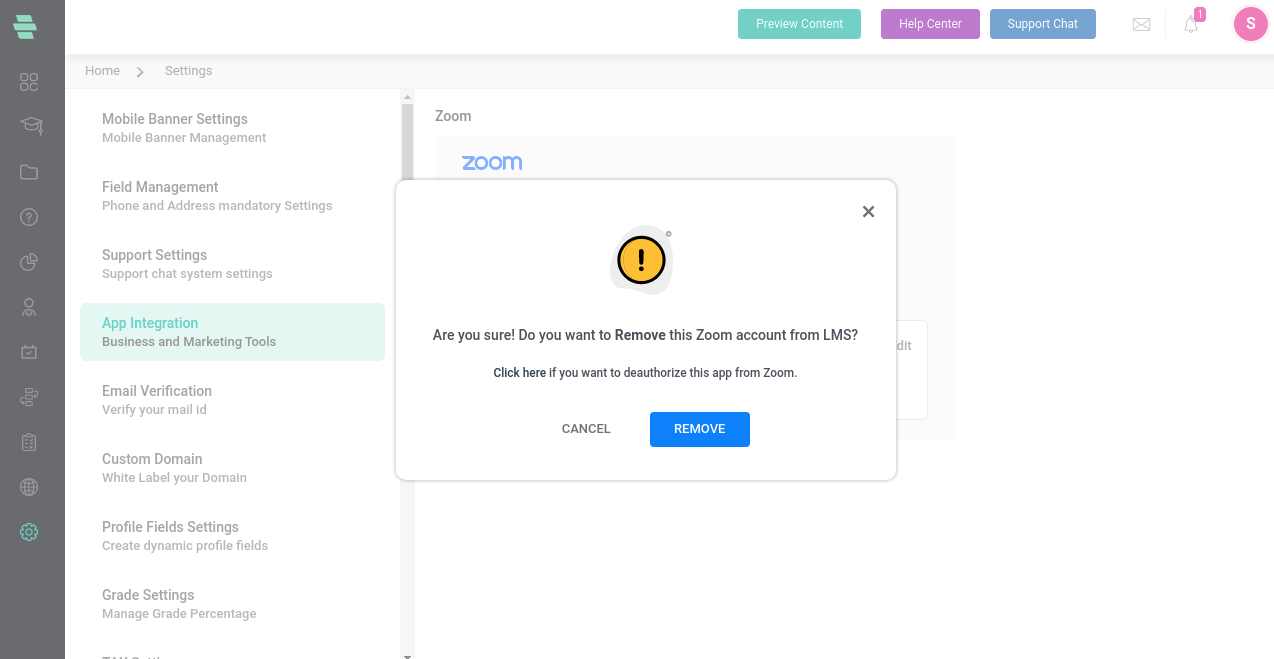
8. Click on Remove so that the Zoom account will be removed from the LMS platform.
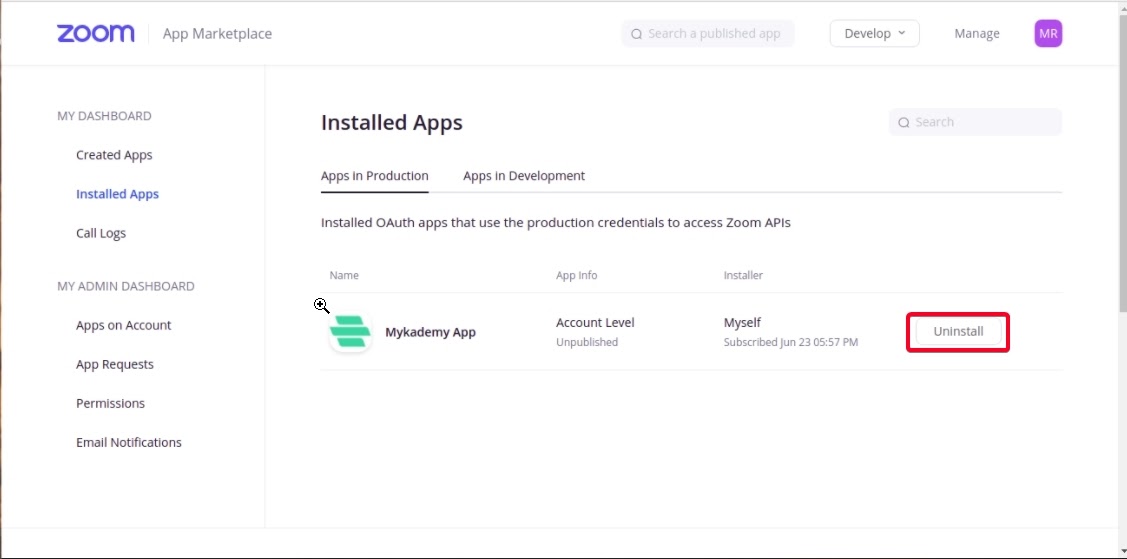
9. If the admin needs to deauthorize the Mykademy app from the customer’s Zoom account, click on the message displayed in the pop up ( Click here if you want to deauthorize the app from Zoom)
10. So by clicking on the message, the user will be taken to the page as displayed below.
11. A user can also get redirected to the uninstallation page from here
12. Click on the Uninstall button so that the Mykademy app will be removed from the customer’s Zoom account.