There is the ability to incorporate a registration process when setting up your scheduled online event.
You access these configurations by selecting on the Registration tab after clicking the Advanced Options button when creating your meeting.

- You can make registration mandatory, optional or not require it all (registration is turned off by default).
- We have a list of pre-defined commonly used fields – you can make use of these by selecting the appropriate the check boxes to the right of each field. ‘Show’ render the field on the registration form, you can make a field mandatory by checking the ‘Required’ check box.
Let’s have a look at some of these options in a little more detail:
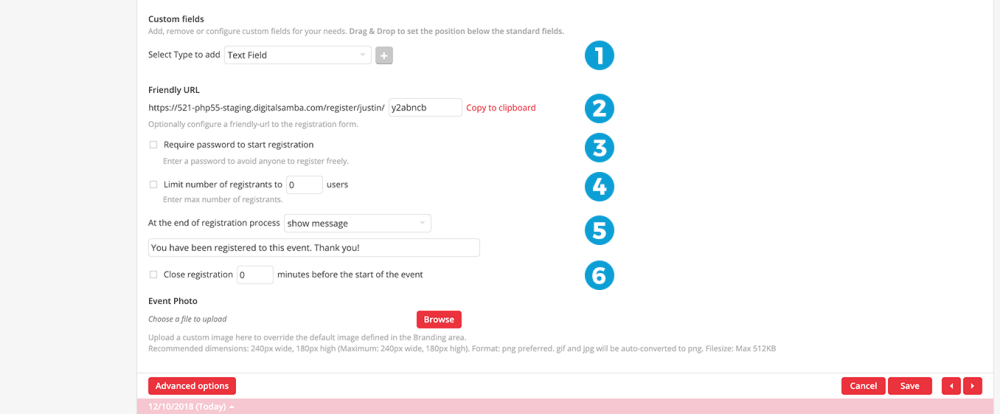
- 1. Custom fields:
You can also add your own custom form fields and again decide if you want to make any of these fields mandatory during the registration process. - 2. Friendly URL:
You can customize your registration URL rather than use the randomly generated characters that Mykademy Live uses to identify your event registration page. - 3. Require password:
You can optionally require a password before someone can complete registration. - 4. Limit registrants:
You may want to cap the amount of people who can register for your event. - 5. Show message:
Once someone has completed the registration process – you can modify the message that is shown or redirect them to a webpage of your choice. - 6. Registration period:
You can optionally set a time limit after which people will no longer be allowed to register for your event.