How to Create a Test and add it to a Section
- On the Overview page, click COURSE CONTENT on the left pane and then click TEST in the right pane. The CREATE TEST window pops up.

- Type a title for the Test, choose a section in which you want to add the Test and add a brief description for the Test.
Note: If not already created, you can create a new section on this popup by clicking ADD NEW SECTION, and choose that section to place the Test.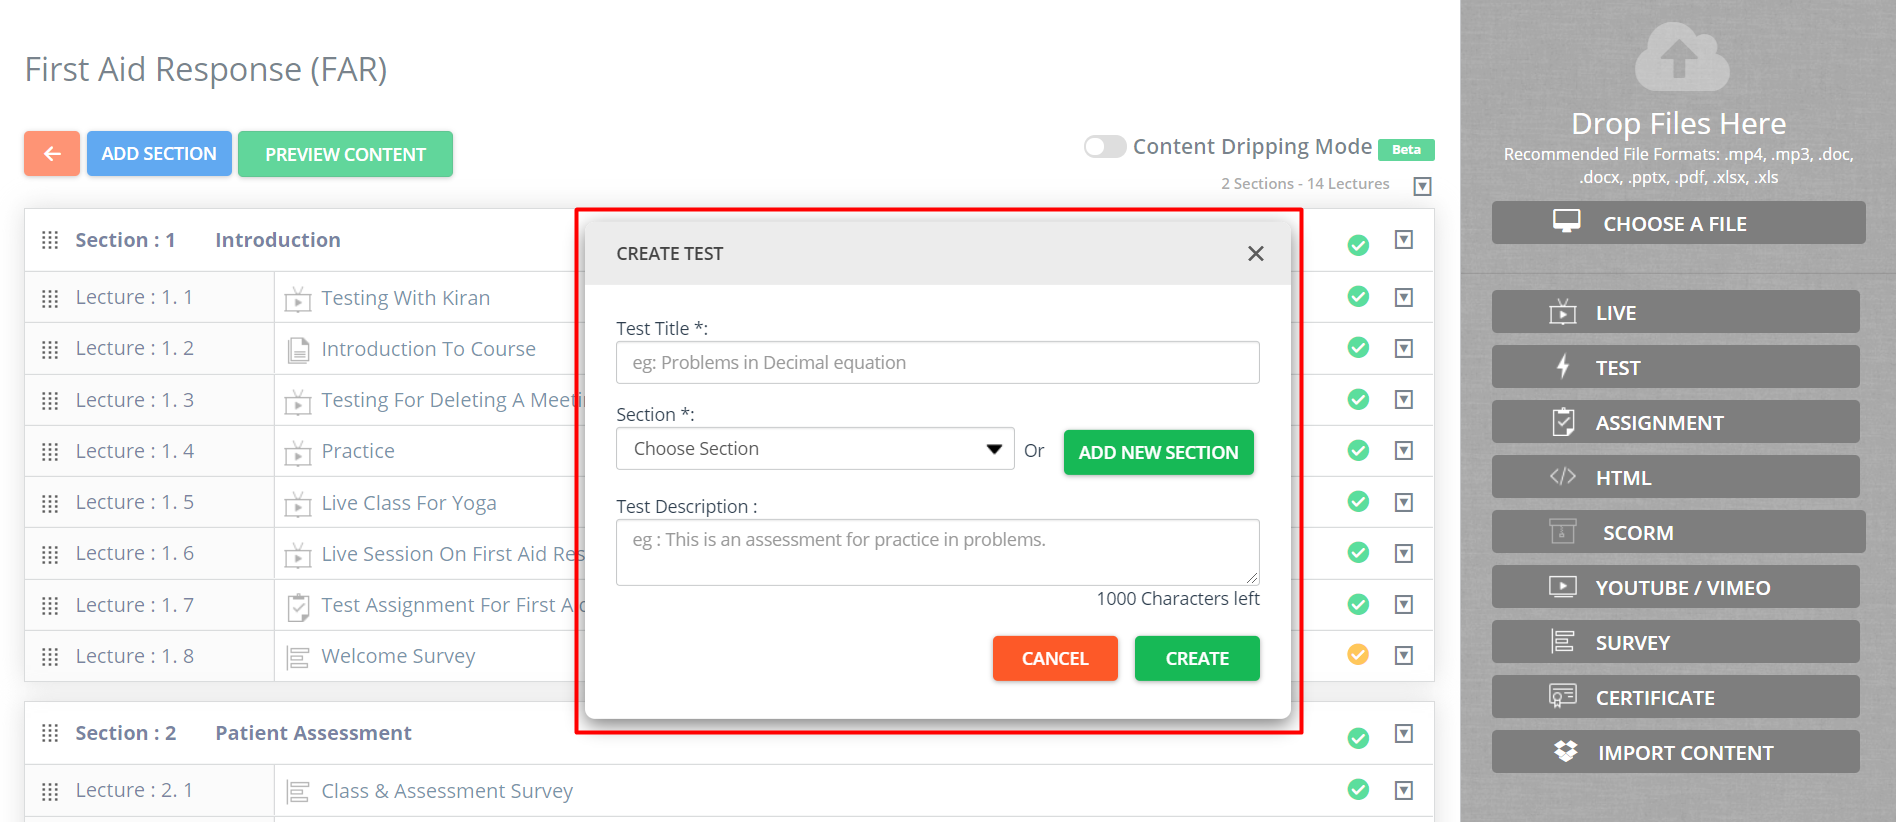
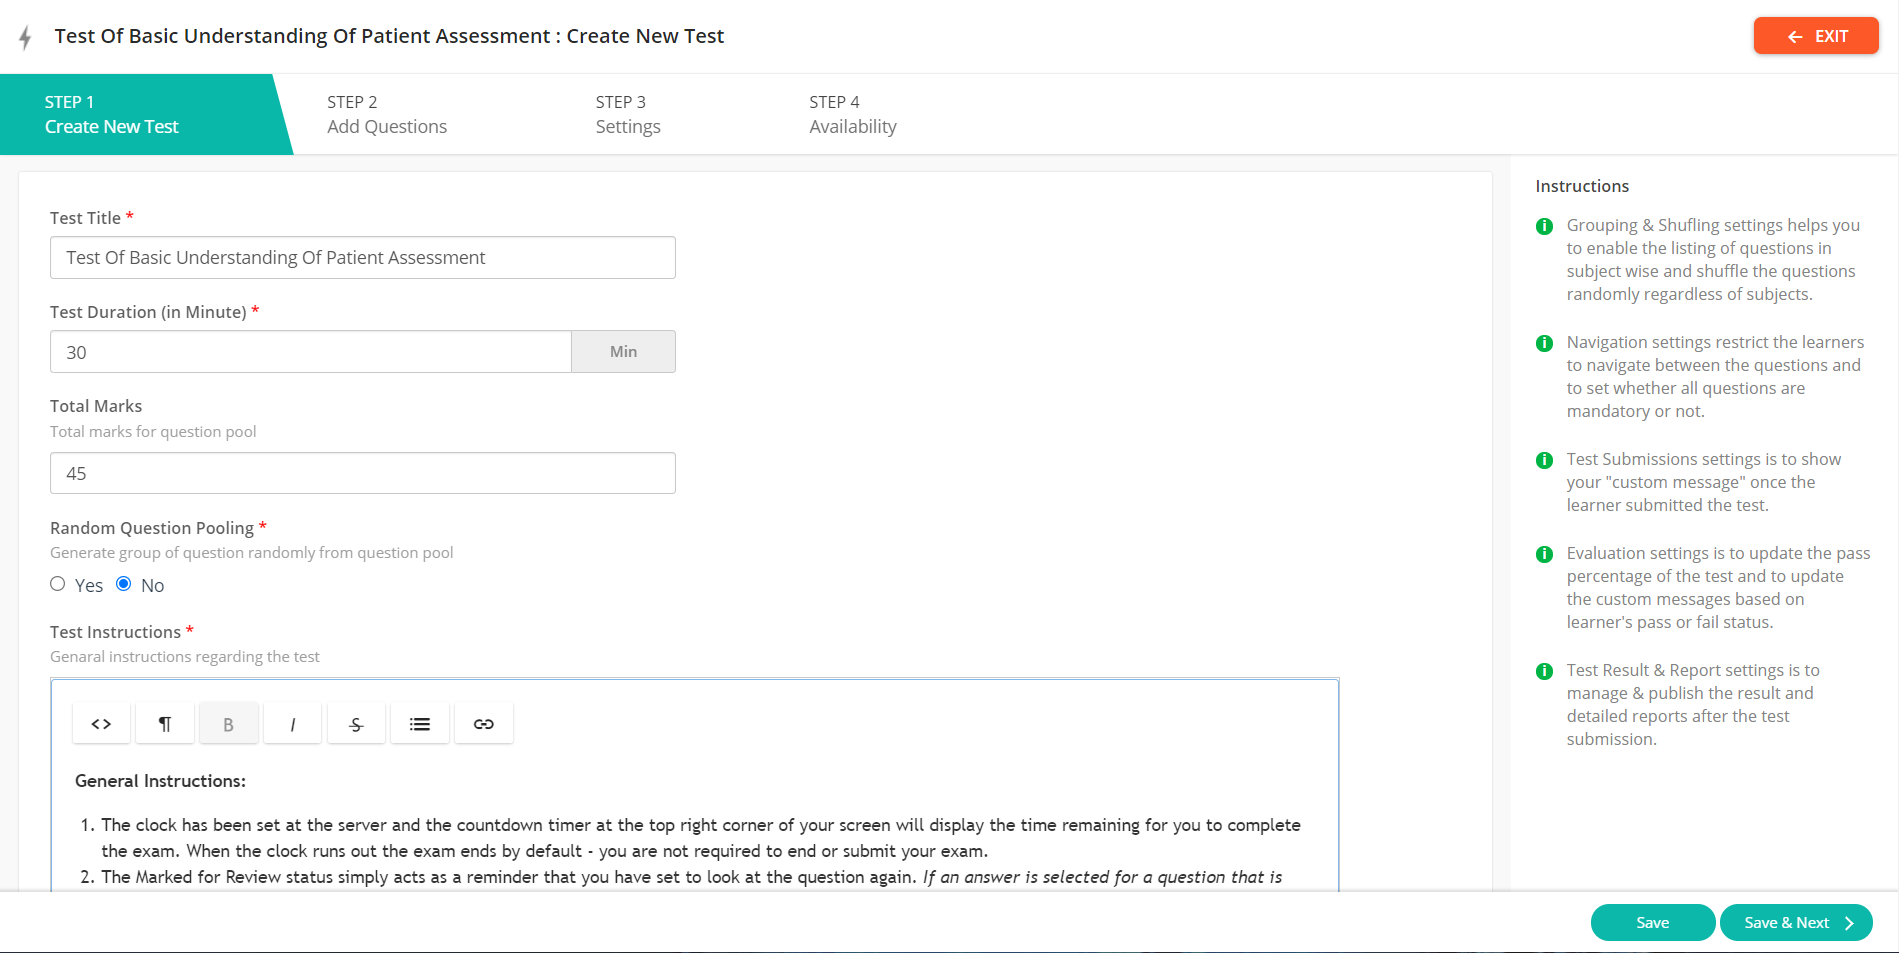
- Click CREATE. The STEP 1 CREATE NEW TEST page appears
- Specify the following details:
- Test Name – Appears by default, as specified in step 2 (Test Title). However, you can change it here if you wish.
- Duration (In Min.) – Specify the time by which the Test must be completed.
- Total Marks – Enter the total marks for the Test
- Random question pooling - If the admin clicks Yes, then the total number of random questions, positive mark and negative mark should be entered.
- By enabling random question pooling, if the admin uploads 100 questions and if the total number of random questions is set as 10, then each learner will get 10 random questions. The system automatically shuffles the questions among the learners.
- Even if the learner attends the test for the second time, he/she will be facing the same questions which were present in the first test.
- Default Instruction – Specify detailed instructions required to take up the Test
- Click SAVE & NEXT and then click CONTINUE to go to the next screen.
- Click OK. The ADD QUESTIONS page appears.
- Add questions to the Test using any options available in the right pane. Options available are:
- Import From Bank
- Upload Question
- Add Question
Note: For detailed instructions on adding questions using these options, refer to their corresponding sections below.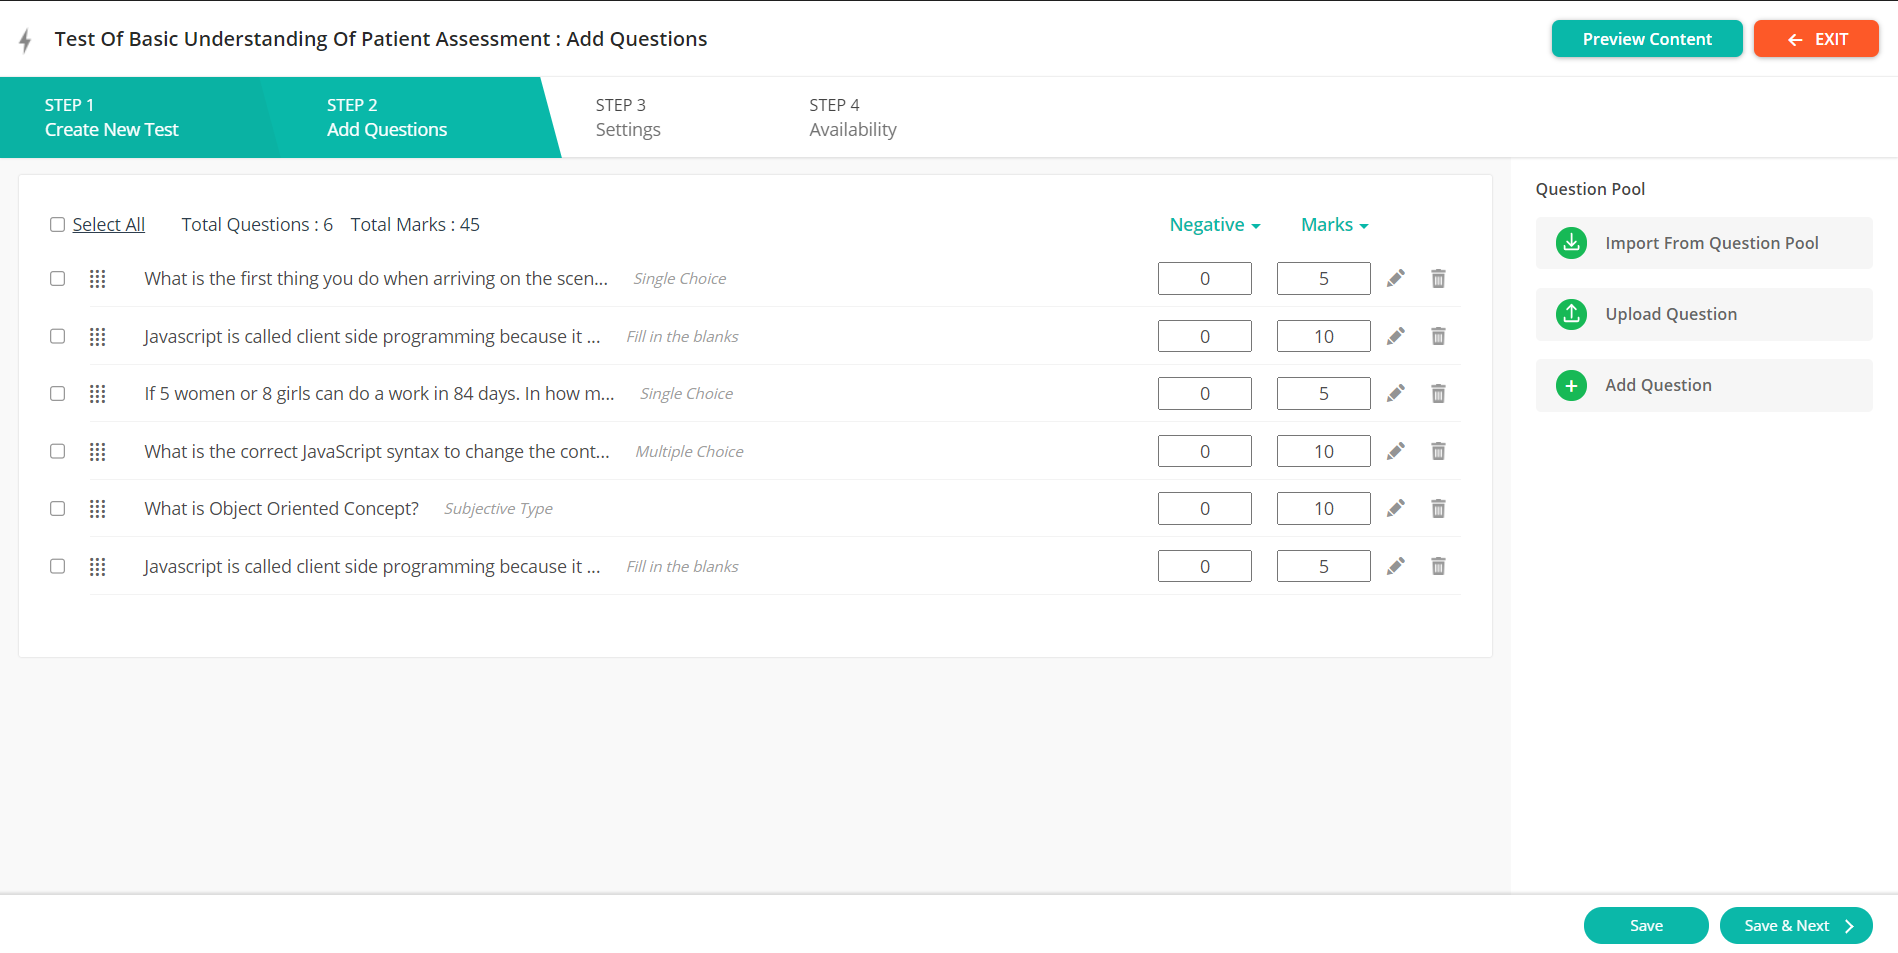
- Click on Save and Next
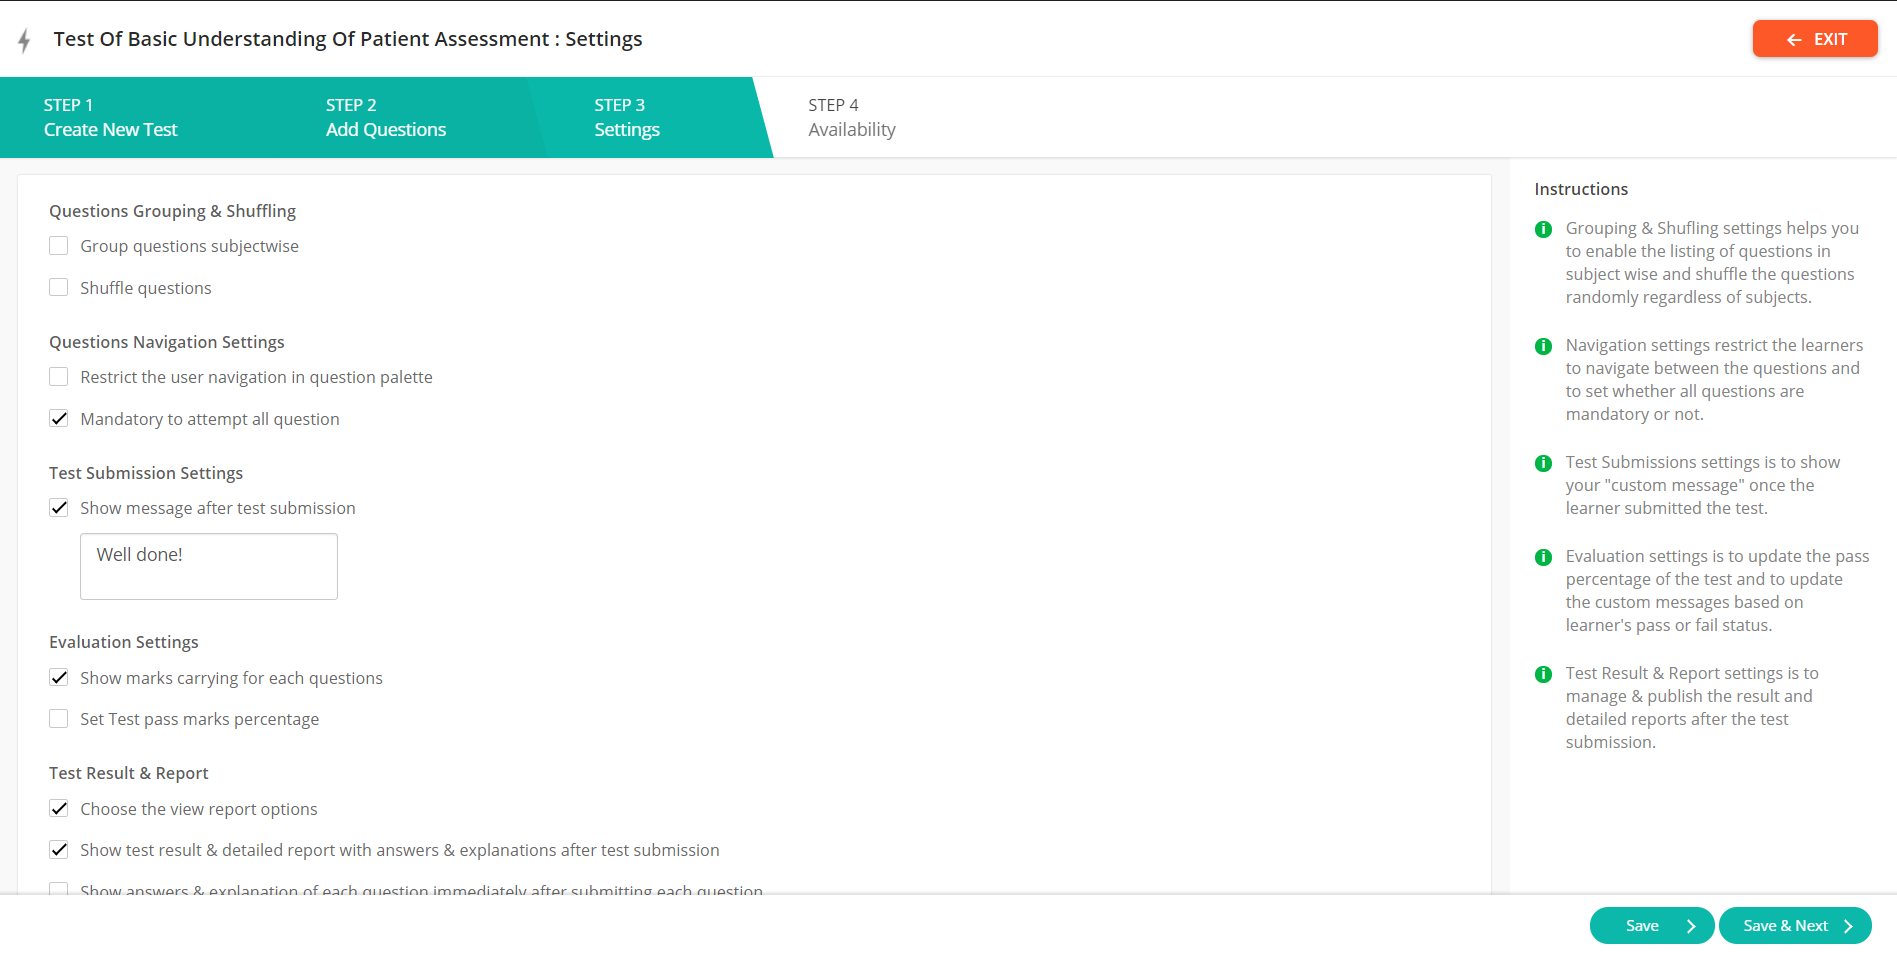
- Specify the following settings for the Test:
- Arrangement & Grouping – Select the desired option(s) if you want to group questions based on subjects and/or shuffle them.
- Test Options – Select the desired options if you want to display marks for each question in the Test, restrict Learners from navigating in the question palette and/or mandate Learners to attempt all questions.
- End Test Settings – Select the option to give a completion message to the Learners after completing and submitting the Test. Type the message that the Learners can view after the Test submission.
- Evaluation Settings – Select the option to specify the passing percentage of the Test and to specify the passing and failing feedback message to the Learners after the Test is submitted.
- Candidate Reports Settings – Select the options to display overall result reports, immediate results after submitting each question or result reports after submitting the entire Test.

- Click SAVE & NEXT and then click OK to go to the next screen. The Step 4 TEST AVAILABILITY screen appears.
- Choose one of the following options:
- Unlimited Access – Choose this option if the Learners can attempt the course any number of times.
- Limited Access – Choose this option if you want to set a limit on the number of times the Learners can attempt the course. Specify the number of times in the corresponding text box.
- Percentage of completion – Set the desired percentage of course completion in order to attend the test.
- Content dripping – The test can be made available to a certain day/date.
- Learners must match the following rules, choose an option from the drop-down to specify rules:
- All – Choose this option to restrict Learners to match all rules seen below this option.
- Anyone – Choose this option to restrict Learners to match anyone rule seen below this option.
- To add a new rule to the Test, click ADD NEW RULE.
- Choose the lecture (Test) and a rule for it from the available drop-down menus.
- To add more rules, repeat step 12 and step 13 in this procedure.
- Click EXIT to see the Test added to the section on the COURSE CONTENT page.