You can upload HTML content as lectures to the section of a course.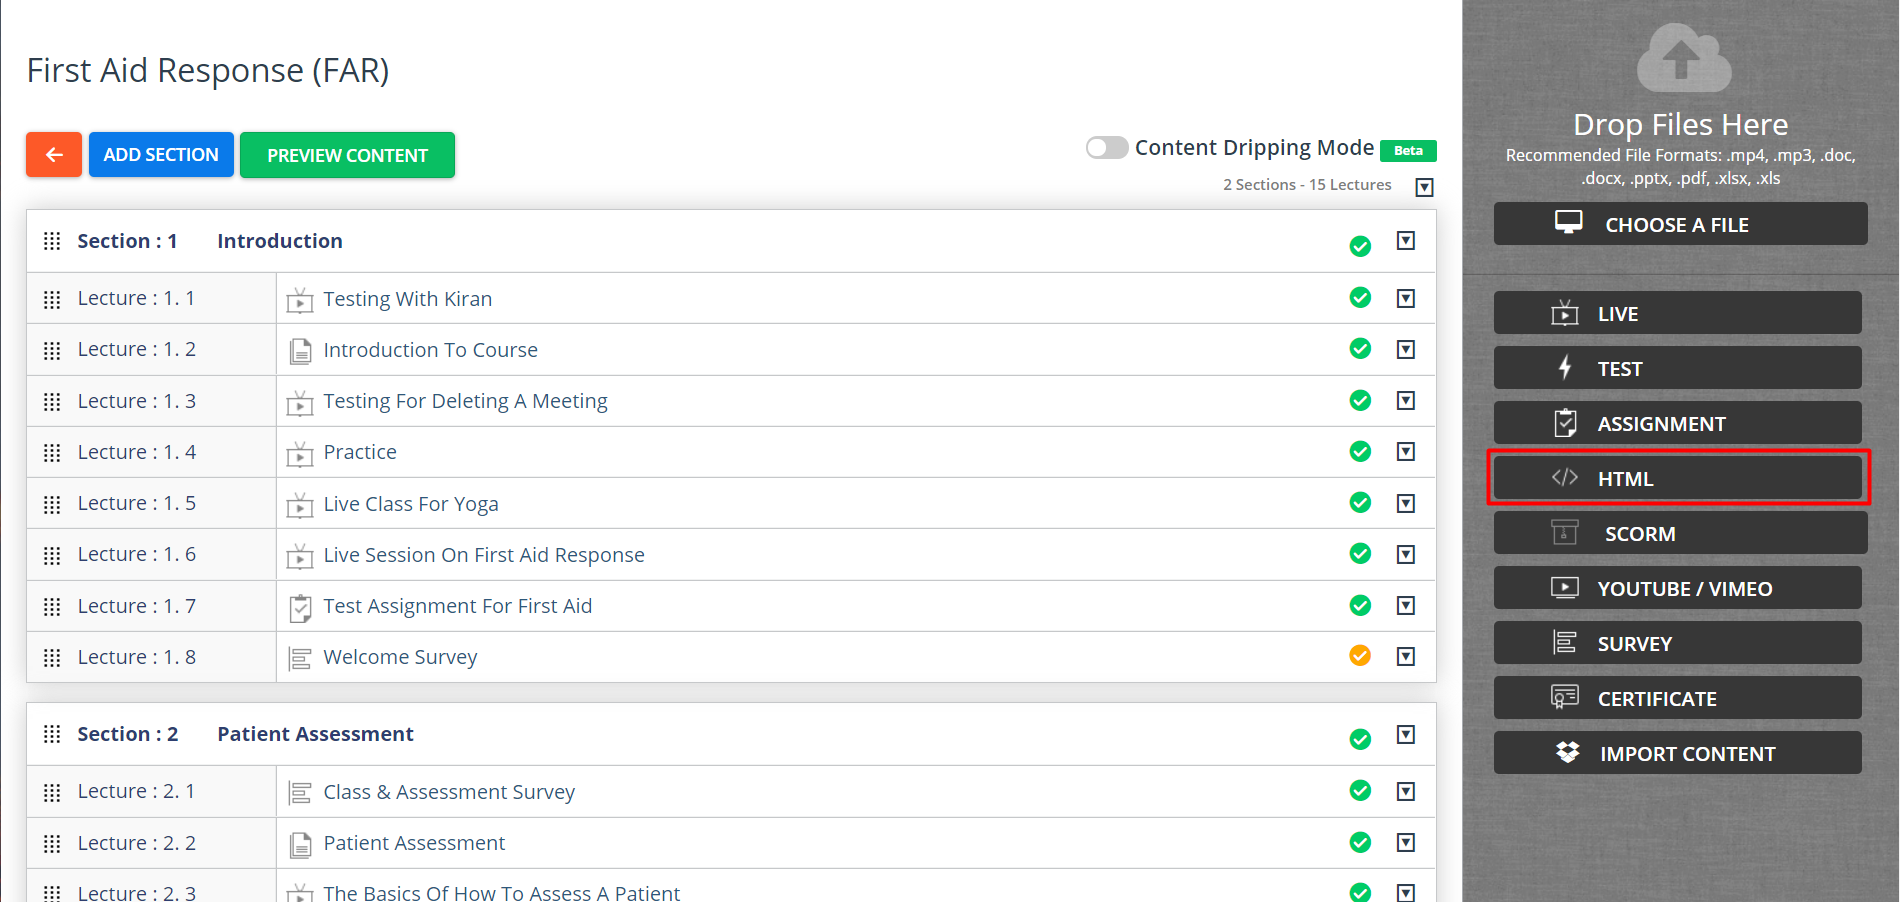
- On the COURSE CONTENT page, click HTML in the right panel. The CREATE HTML CONTENT window pops up.
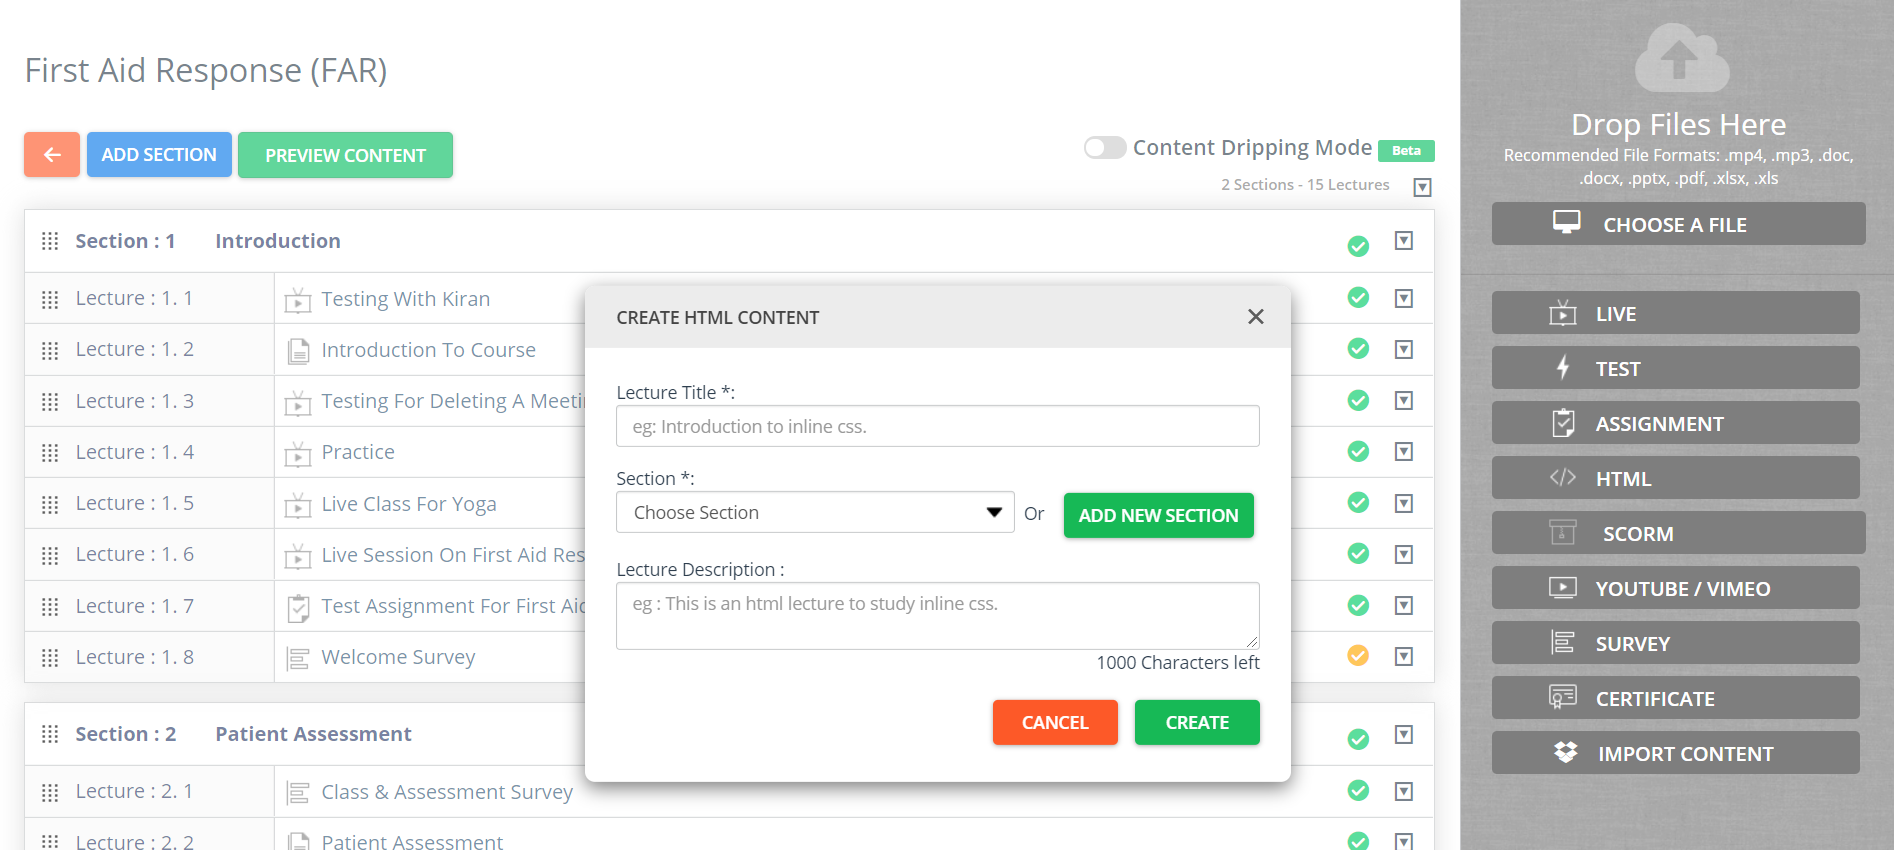
- Type a title for the HTML content lecture, choose a section in which you want to add the content lecture, and add a brief description for the lecture
Note: If not already created, you can create a new section on this popup by clicking ADD NEW SECTION, and choosing that section to place the lecture. - Click CREATE. On the next page, click on the <> top-left corner of the screen to type the HTML content in the space provided using the HTML tags.
- Click SAVE or <> view the content in plain text format.
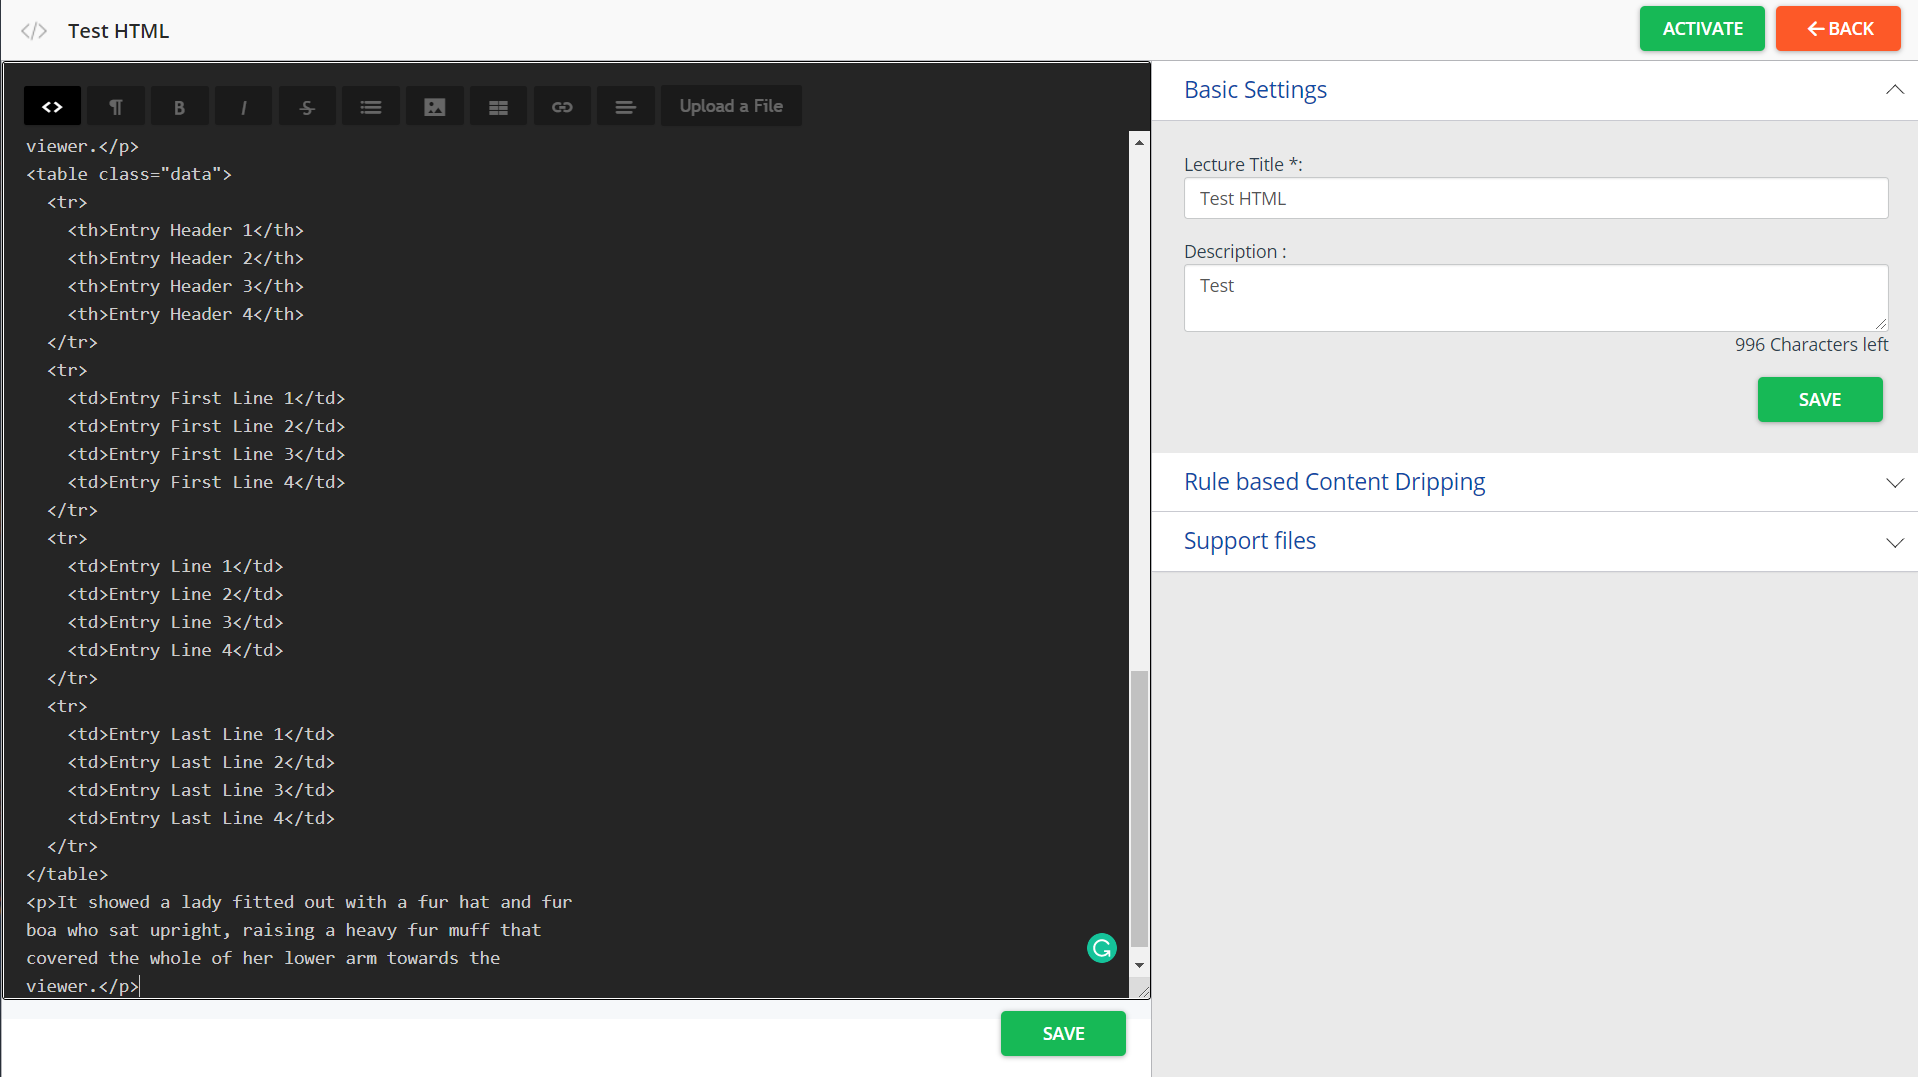
- In the right panel, review the Basic Settings of the HTML content lecture. Edit them if required and click SAVE, else retain the existing values.
- Click Access Restriction on the right panel to expand its view and specify the learner’s access restriction parameters for the lecture as required and click SAVE.
- Click to see the HTML content added to the section on the COURSE CONTENT page.